Some services require you to generate random hex numbers to be used as a password or random auth token for authentication. The simplest method is to use this openssl cli command
openssl rand -hex 24
Free and Open Source blogger with an attitude
Some services require you to generate random hex numbers to be used as a password or random auth token for authentication. The simplest method is to use this openssl cli command
openssl rand -hex 24I’ve finally had the time to convert preprint academic articles of JCRINN to markdowns!
Microsoft Word documents are common in research, teaching, and administration. When preparing these documents for a large language model (LLM), converting them to Markdown gives you a readable text file that you can inspect, edit, and supply to an AI application.
Pandoc is a command-line document converter available on Linux. It supports Microsoft DOCX input and several Markdown formats, making it useful for preparing manuscripts, reports, lecture notes, and technical documentation. Its focus is document structure, rather than reproducing the original page layout. Pandoc documentation
For academic writing, sections such as Introduction, Methods, Results, and Discussion provide useful boundaries. A retrieval system can divide a document at these boundaries and retrieve relevant passages when answering a question. Microsoft’s Azure AI Search documentation provides a concrete example of indexing Markdown by heading and retaining section information. This supports using Markdown as a practical format for structured retrieval. Microsoft documentation
The practical benefits include:
Markdown does not make an LLM automatically understand a document better or prevent invented answers. It also does not necessarily reduce token usage compared with a good DOCX text extractor. File size on disk is not a reliable measure of model input tokens. The benefit is greater control over the text and structure entering your workflow.
Step 1: Install Pandoc
sudo apt install pandocUbuntu’s repository version may be older than the latest upstream release. If you need a newer feature or conversion fix, consult the official Pandoc installation instructions. A LaTeX installation is unnecessary for DOCX-to-Markdown conversion.
Step 2 : Convert DOCX to Markdown (single file)
pandoc "report.docx" --from=docx --to=gfm --wrap=none -o "report.md"For an academic manuscript with footnotes and equations, Pandoc’s own Markdown format is another useful choice:
To extract embedded images and update their references:
pandoc "report.docx" --from=docx --to=markdown --wrap=none \
  --extract-media="report-assets" -o "report.md
These formats and options are documented in the Pandoc User’s Guide. Running another example with the same output filename replaces the previous Markdown file.
An image reference does not give a text-only model access to the image’s contents. Supply figures separately to a vision-capable system, or add verified descriptions and relevant values as text.
Step 3: Review the converted document
Compare it with the Word original. Check section headings, numerical results, units, table labels, equations, references, and figure captions. Complex tables and formatting may not survive conversion accurately. Pandoc conversion limitations
For research documents, retain the qualifications attached to findings. A reported accuracy value without its dataset, evaluation method, or limitations can produce a misleading summary.
Step 4: Use the Markdown with an LLM
Upload the file to an application that accepts Markdown, or paste a relevant section into the conversation. For a larger collection, configure your retrieval workflow to preserve document identity and section headings with each passage.
A useful starting prompt is:
Using only the supplied document, identify the research objective, method, dataset, main results, and limitations. Cite the relevant section for each item. Preserve numerical values and units exactly. If information is absent, state “not reported”.
BONUS: Batch convert all DOCX files with bash
For a folder containing several documents, save the following script as batch-docx-to-markdown.sh
The script can be downloaded here in this gist: https://gist.github.com/mypapit/df6615f8611f03678bc93ee0485001be#file-batch-docx-to-markdown-sh
Sometimes I need a simple way to convert an MP3 file into a video suitable for YouTube. Instead of using a static image.
I created a small Bash script that generates an animated frequency spectrum using FFmpeg.
The script uses FFmpeg’s showfreqs filter to generate an animated frequency spectrum from the audio.
Step 1 : Download the script from gist
wget -c https://gist.githubusercontent.com/mypapit/37817eab6988fe05b87c64025409a894/raw/c04a917e12e9b89e6784783d19061dc771dbed99/spectrum.sh
Step 2: make it executable chmod +x spectrum.sh
Step 3: Use the script – ./spectrum.sh song.mp3
Alternatively you can also convert/export multiple mp3 files : ./spectrum.sh *.mp3
The main advantage is simplicity. There is no video editor, GUI application, or complicated workflow involved. FFmpeg handles the audio analysis, visualization, video encoding, and audio encoding in a single operation.
It is also easy to modify the showfreqs parameters if you want different spectrum sizes, positions, frame rates, scaling methods, or visual styles.
For batch processing MP3 files into simple spectrum videos, this small Bash script provides a practical solution.
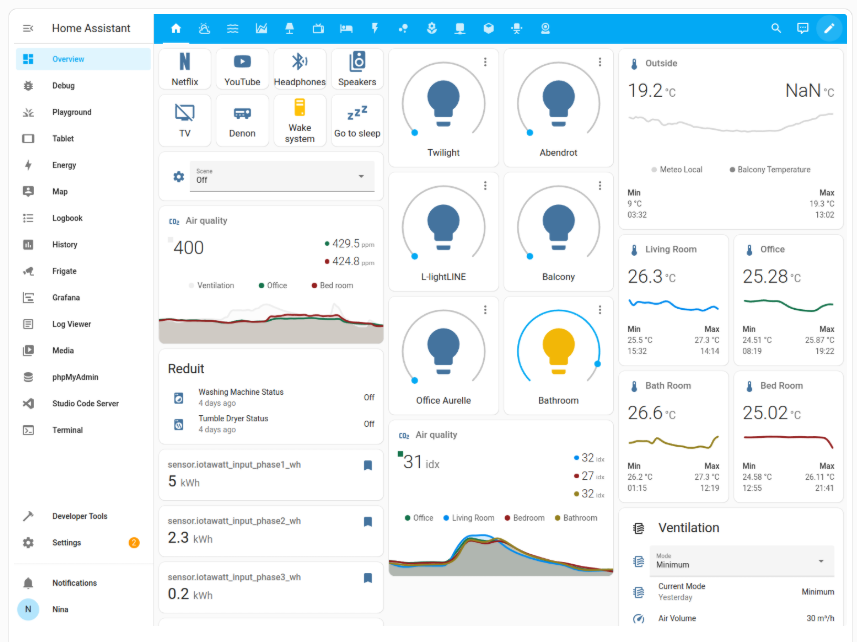
Home Assistant is one of the most practical platforms for building a local smart home system. It can connect sensors, switches, cameras, MQTT devices, smart plugs, Zigbee devices, dashboards, and automation rules in one place.
For Ubuntu 26.04, one clean way to install it is by using Home Assistant Container with Docker Compose. This keeps the setup simple, portable, and easy to update. Home Assistant officially supports the container installation method, but note that this method does not include Home Assistant OS apps or Supervisor features. You manage the container yourself.
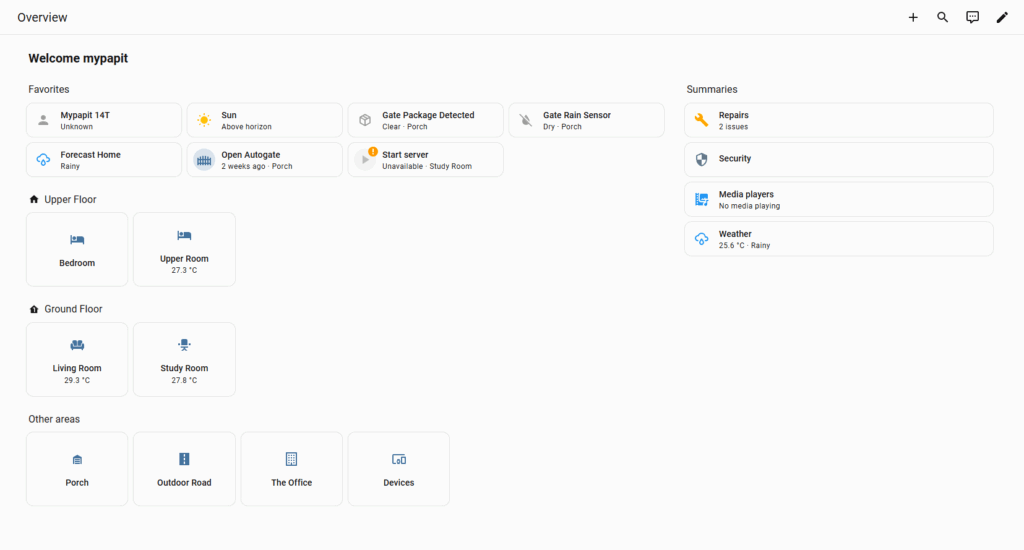
Screenshots
Step 1: Setting up docker container
sudo apt update
sudo apt upgrade -y
Install required packages:
sudo apt install ca-certificates curl -yAdd Docker’s official GPG key and repository:
sudo install -m 0755 -d /etc/apt/keyrings

sudo curl -fsSL https://download.docker.com/linux/ubuntu/gpg \
-o /etc/apt/keyrings/docker.asc

sudo chmod a+r /etc/apt/keyrings/docker.asc

sudo tee /etc/apt/sources.list.d/docker.sources <<EOF
Types: deb
URIs: https://download.docker.com/linux/ubuntu
Suites: $(. /etc/os-release && echo "${UBUNTU_CODENAME:-$VERSION_CODENAME}")
Components: stable
Architectures: $(dpkg --print-architecture)
Signed-By: /etc/apt/keyrings/docker.asc
EOF
Then install Docker Engine and Docker Compose plugin
sudo apt update
sudo apt install docker-ce docker-ce-cli containerd.io docker-buildx-plugin docker-compose-plugin -y
Docker’s official documentation lists Ubuntu 26.04 LTS as a supported Ubuntu release for Docker Engine, and recommends installing Docker from its official apt repository.
sudo systemctl status dockerStep 2 Create Home Assistant Folder
Create a folder to store the Home Assistant configuration:
sudo mkdir -p /opt/homeassistant/config
sudo chown -R $USER:$USER /opt/homeassistant
cd /opt/homeassistant
This folder is important because your Home Assistant settings, integrations, dashboards, and YAML files will be stored here.
Step 3. Create Docker Compose File
nano compose.yamlPaste this configuration
services:
  homeassistant:
    container_name: homeassistant
    image: ghcr.io/home-assistant/home-assistant:stable
    volumes:
      - /opt/homeassistant/config:/config
      - /etc/localtime:/etc/localtime:ro
      - /run/dbus:/run/dbus:ro
    restart: unless-stopped
    privileged: true
    network_mode: host
    environment:
      TZ: Asia/Kuala_Lumpur
Home Assistant recommends network_mode: host for the container setup, because many smart home integrations rely on local network discovery. The official container guide also shows the /config volume, D-Bus mapping, privileged mode, and Docker Compose structure
Start Home Assistant:
docker compose up -dCheck the logs:
docker logs -f homeassistantThen you can try and access your Home Assistant from your browser
http://YOUR_SERVER_IP:8123
http://192.168.1.50:8123
If you are running UFW firewall, allow port 8123
sudo ufw allow 8123/tcpAdditional Tips:
For an Ubuntu Docker setup, integrations that depend on USB hardware, such as Zigbee dongles, may need device mapping. For example:
devices:
  - /dev/ttyUSB0:/dev/ttyUSB0
Updating Home Assistant
You can periodically execute this to update Home Assistant docker container:
cd /opt/homeassistant
docker compose pull
docker compose down
docker compose up -dyt-dlp is a command-line tool for which allows a user to download audio/video from thousands of sites. The project is a fork of youtube-dl, which is based on the now inactive youtube-dlc.
yt-dlp can be installed using official releases or via package manager.
Unix-like operating system
curl -L https://github.com/yt-dlp/yt-dlp/releases/latest/download/yt-dlp -o ~/.local/bin/yt-dlp
chmod a+rx ~/.local/bin/yt-dlp  # Make executable
To update yt-dlp in Unix-like operating system
yt-dlp -UHomebrew MacOS
brew install yt-dlp
Ubuntu
sudo add-apt-repository ppa:tomtomtom/yt-dlp # Add ppa repo to apt
sudo apt update # Update package list
sudo apt install yt-dlp # Install yt-dlp
Snap
sudo snap install --edge yt-dlpWindows operating system
yt-dlp is also available for Windows operating system by using, winget:
winget install yt-dlp
Microsoft Windows binary package
The binary package for Microsoft Windows binary package can be downloaded from yt-dlp GitHub release page
Note that yt-dlp requires ffmpeg windows binaries which can be obtained from gyan.dev’s Codex FFMPEG Build
Please refer to this post for more information on the tips and tricks on using yt-dlp.
A lot of people struggling in configuring PKP Open Journal System 3 (OJS3) to run behind nginx reverse proxy as OJS3 does not support nginx natively
So most implementation would settle with Apache HTTPD server or install it behind nginx reverse proxy.
However the problem is that the OJS3 behave badly when placed behind nginx reverse proxy, especially when the reverse proxy is using HTTPS / TLS. This messed up the based URL in the OJS3, subsequently causing some resources from the website to be unavailable.
To solve this, you only need to add a single line in the Apache HTTPD site configuration file.
SetEnvIf X-Forwarded-Proto "https" HTTPS=on
A full blown example is included via gist