Here’s a quick tip on how to download and save entire website recursively using wget.
wget -r --no-parent https://this.is.example.com/site/

Free and Open Source blogger with an attitude
Guides or tutorials (computer related)
Here’s a quick tip on how to download and save entire website recursively using wget.
wget -r --no-parent https://this.is.example.com/site/
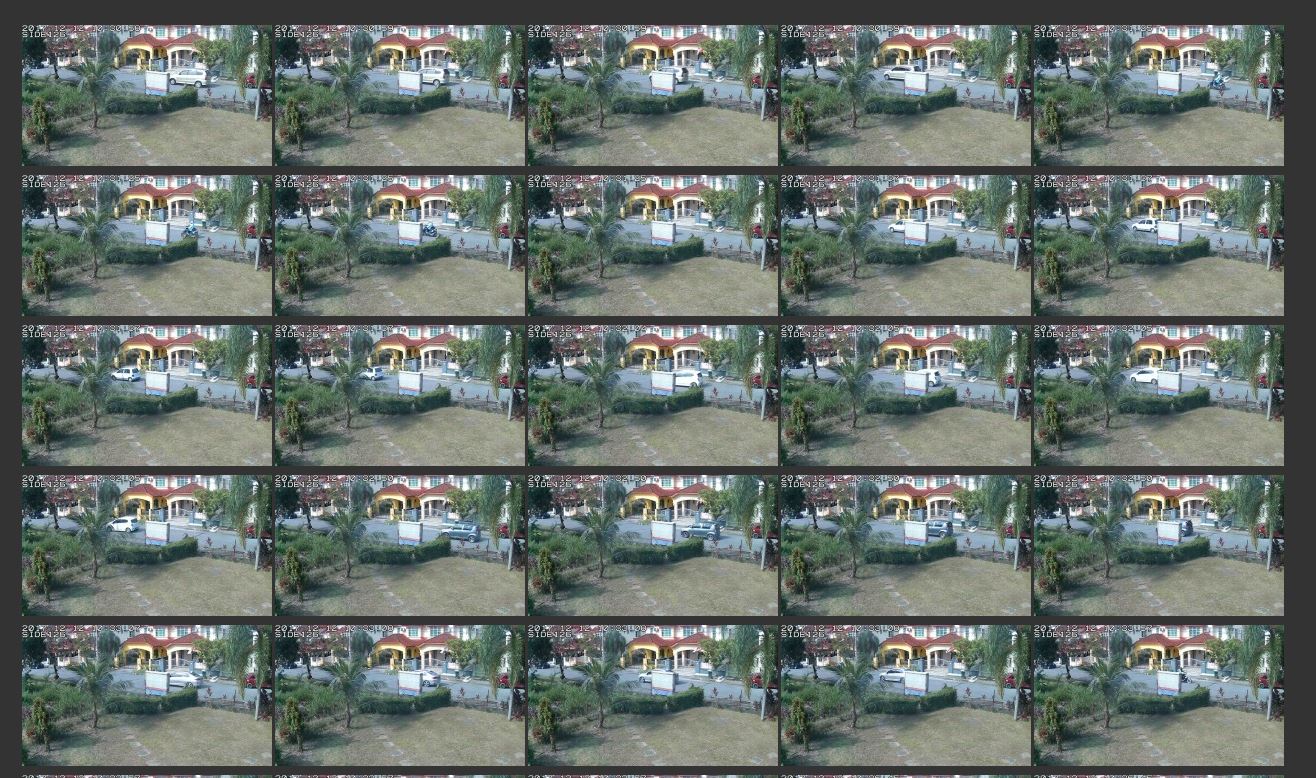
LLGAL (llgal) is an tool which can automatically generate gallery on your website. llgal is handy if you want to generate photo album out of photos organized in directories/folders.
Running llgal from the console is easy as typing the llgal command at the root directory of your photos.
llgal --exif --li -L -R --title "Album Name" --sx 960 --sy 720 --tx 250 --ty 150
In Ubuntu, the gallery’s theme is located in “/usr/share/llgal/” directory and my customized theme which supports mobile phone can be downloaded here: llgal.zip (mobile enabled)
Personally, i use llgal to generate cctv tiles automatically on my Ubuntu server from which my TP-LINK NC450 and NC250 IP camera uploads through its FTP functions when it detects movements/motion.
llgal can be installed on Ubuntu by running this command
apt -y install llgal
Alternatively you can compile and install llgal directly from its repository
https://github.com/bgoglin/llgal
This is a a guide to integrate Telegram messaging service Fail2Ban. With this integration, Fail2Ban notification will be sent through Telegram services.
![]()
After installing ‘telegram-cli’ and its requirements, you should proceed to add ‘telegram.conf’ config in /etc/fail2ban/action.d
The content of “telegram.conf“ is as follows.
#
# /etc/fail2ban/action.d/telegram.conf
#
# Author: Toon Ketels
# Modified by: Mohammad Hafiz bin Ismail [mypapit @gmail.com]
#
# $Revision$
#

[Definition]

# Option:  actionstart
# Notes.:  command executed once at the start of Fail2Ban.
# Values:  CMD
#
actionstart = /usr/share/fail2ban/fail2ban-telegram.sh start

# Option:  actionstop
# Notes.:  command executed once at the end of Fail2Ban
# Values:  CMD
#
actionstop = /usr/share/fail2ban/fail2ban-telegram.sh stop

# Option:  actioncheck
# Notes.:  command executed once before each actionban command
# Values:  CMD
#
actioncheck =

# Option:  actionban
# Notes.:  command executed when banning an IP. Take care that the
#          command is executed with Fail2Ban user rights.
# Tags:    [ip]  IP address
#          [failures]  number of failures
#          [time]  unix timestamp of the ban time
# Values:  CMD
#
actionban = /usr/share/fail2ban/fail2ban-telegram.sh ban [ip]

# Option:  actionunban
# Notes.:  command executed when unbanning an IP. Take care that the
#          command is executed with Fail2Ban user rights.
# Tags:    [ip]  IP address
#          [failures]  number of failures
#          [time]  unix timestamp of the ban time
# Values:  CMD
#
actionunban = /usr/share/fail2ban/fail2ban-telegram.sh unban [ip]

[Init]

init = 'Fail2Ban Telegram plugins activated"
Then, you need to create a script file in “/usr/share/fail2ban/fail2ban-telegram.sh“.
#!/bin/bash
# /usr/share/fail2ban/fail2ban-telegram.sh
#
# Sends text messages using telegram api
# to alert server administrator of ip banning.
#
# Requires one argument, one of the following:
#  start
#  stop
#  ban
#  unban
#
# Optional second argument: IP for ban/unban


#replace this with your own telegram contact

to=Telegram_peer_replace_this

# Display usage information
function show_usage {
  echo "Usage: $0 action [ip]"
  echo "Where action is start, stop, ban, unban"
  echo "and ip is optional passed to ban, unban"
  exit
}


# Actually send telegram messages
# Expects the telegram content (body) to be passed
# as argument.
function send_telegram {

  msg="[`date -Iminutes`] - `hostname`:  Notice: $1 "
  echo "$msg" >> /var/log/fail2ban-telegram.log
 (echo "contact_list";sleep 30;echo "msg $to $msg"; echo "safe_quit") | telegram-cli
  exit
}


# Check for script arguments
if [ $# -lt 1 ]
then
  show_usage
fi


# Take action depending on argument
if [ "$1" = 'start' ]
then
  message="Fail2ban just started."
  send_telegram "$message"
elif [ "$1" = 'stop' ]
then
  message="Fail2ban just stopped."
  send_telegram "$message"
elif [ "$1" = 'ban' ]
then
  message=$([ "$2" != '' ] && echo "Fail2ban just banned $2" || echo 'Fail2ban just banned an ip.' )
  send_telegram "$message"
elif [ "$1" = 'unban' ]
then
  message=$([ "$2" != '' ] && echo "Fail2ban just unbanned $2" || echo "Fail2ban just unbanned an ip." )
  send_telegram "$message"
else
  show_usage
fi
After that, you need to ensure that the script is executable, by running.
sudo chmod a+rwx /usr/share/fail2ban/fail2ban-telegram.sh
Then, you need to edit “/etc/fail2ban/jail.conf” file to hook the action plugin with events. In this case, I choose the ssh and sshd events.
sudo nano -c /etc/fail2ban/jail.conf
Then proceed to find the [ssh] and [ssh-ddos] part. Add ‘telegram’ config in the file. Replace the “webmaster@example.com” email address with your email address.
[ssh]

enabled  = true
port     = ssh
filter   = sshd
logpath  = /var/log/auth.log
maxretry = 3
action = mail-whois[name=SSH, dest=webmaster@example.com]
         telegram
Now go to the “ssh-ddos” section, repeat the same step.
[ssh-ddos]

enabled  = true
port     = ssh
filter   = sshd-ddos
logpath  = /var/log/auth.log
maxretry = 4
action = mail-whois[name=SSH, dest=webmaster@example.com]
         telegram
Finish up by restarting fail2ban server, and if you done it correctly you will be receiving both telegram messages and email notification regarding fail2ban startup!
sudo service fail2ban restart

Congratulations!!
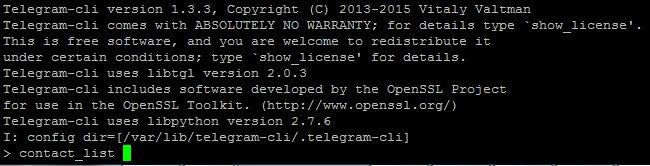
You can actually send Telegram message from command-line interface / bash in Linux using an unofficial “telegram-cli“ client by Vitali Valtman (vysheng)
But first, before sending telegram messages, you need to build the client. You may start by installing its dependencies
sudo git apt-get install libreadline-dev libconfig-dev libssl-dev lua5.2 liblua5.2-dev libevent-dev libjansson-dev libpython-dev make
Then, you can get the latest telegram-cli client from vysheng GitHub
git clone --recursive https://github.com/vysheng/tg.git && cd tg
Afterwards, you may configure ‘telegram-cli’ and compile it
./configure
make
Alternative Download
Alternatively, you can download Telegram source code from my server:
After finished compiling telegram-cli, you may try and start using telegram.
bin/telegram-cli -k tg-server.pub
For first time use, you may need to key in the authorization code, the code will be sent to your mobile device to allow ‘telegram-cli’ to log as your username.
bin/telegram-cli -u -k tg-server.pub
In my experience you may need to replace the +[country_code] phone-number with ’00’. so if your phone number includes country code is +60123456789, then you must replace it with 0060123456789 (however, your mileage may vary.
bin/telegram-cli -u 00123456789 -k tg-server.pub
Once the authorization CODE has been entered, you are free to use telegram. Telegram use the concept of ‘peer’ (contact) to send messages instead of phone number. So in order to get a list of your peer, you need to run “contact_list” command.
> contact_list
John_T_Doe
Jane_doe_2
Warrick_Brown
Mark_Nelson
To send message to a peer/contact (for example to Warrick Brown), just type
> msg Warrick_Brown "wassup, dude? want to hang out today?"
To quit, you can type
#telegram-client
> safe_quit
NOTE: IF YOU FAIL TO COMPILE TELEGRAM FROM GITHUB
If you find it difficult or failed to compile telegram-cli from GitHub, then you can download this telegram-cli source code from my server which is tested to compile under Raspbian Jessie, Debian Jessie, Ubuntu 14.04 LTS and Ubuntu 16.04 LTS.
Alternative Telegram source code:
Here is some solution for overheating Wireless Router. Note that I do not own any of these photos.


Source: http://www.boransat.net/board/index.php?topic=28537.0
Uncomplicated Firewall (UFW) is a helper tool which allows you to quickly setup iptables firewall in any Ubuntu server. It is installed by default and it allows you to secure your server at no time!
Basic UFW: Check Status
You can check UFW by running this command. The verbose argument prints additional information such as UFW profiles, logging settings.
The ‘numbered’ argument prints the list of rules with line number. I’ll explain later on the use of this feature.
sudo ufw status
sudo ufw status verbose
sudo ufw status  numbered
Basic UFW: Enable and Disable Firewall
You can easily enable and disable firewall by specifying ‘disable’ and ‘enable’ argument.
Warning : Please do not enable UFW if you’re connecting using SSH connection to your Ubuntu box, you might be disconnected.
sudo ufw disable
sudo ufw enable
Basic UFW: Setting up default rule and Enabling SSH
A lot of you might be connecting to Ubuntu box using SSH connections, so the first step is to setup a default rule and enabling SSH connection.
Deny incoming connection
sudo ufw default deny incoming
Allow incoming SSH connection
sudo ufw allow ssh
Alternatively you can write:
sudo ufw allow 22/tcp
Finally, enable firewall
sudo ufw enable
You can check the firewall rules by running
sudo ufw status
Basic UFW: Enabling other service: HTTP, HTTPS
Enabling web server port and https is as easy as running
sudo ufw allow http
sudo ufw allow https
Basic UFW: Deleting rule
You can delete UFW rule by running
sudo ufw delete allow https
or by specifying its port and protocol
sudo ufw delete allow 443/tcp
Additionally you could also delete rule using its number by running “ufw status numbered” first
sudo ufw status numbered
ufw status numbered
Status: active

     To                         Action      From
     --                         ------      ----
[ 1] 22                         ALLOW IN    Anywhere
[ 2] 22/tcp                     ALLOW IN    Anywhere
[ 3] 443                        ALLOW IN    Anywhere
[ 4] 22 (v6)                    ALLOW IN    Anywhere (v6)
[ 5] 22/tcp (v6)                ALLOW IN    Anywhere (v6)
[ 6] 443 (v6)                   ALLOW IN    Anywhere (v6)
Then pick a firewall rule based on its number to delete, I picked number 3 and 6, because I want to delete https rule
sudo ufw delete 3
sudo ufw delete 6
UFW will print a confirmation prompt and you can continue deleting the firewall rules
/home/mypapit# ufw delete 6
Deleting:
 allow 443
Proceed with operation (y|n)? y
Rule deleted (v6)

/home/mypapit# ufw delete 3
Deleting:
 allow 443
Proceed with operation (y|n)? y
Rule deleted
Intermediate UFW: Deny access from ip address or ip block
You can prevent certain ip address or ip blocks / subnets from reaching your server by running:
sudo ufw deny from 172.18.44.12
Deny an ip address subnet
sudo ufw deny from 172.18.44.0/24
Deny an ip address subnet, example #2
sudo ufw deny from 172.16.0.0/16
Intermediate UFW: Allow services to be connected from certain ip address or subnet
In this case, I will only allow certain ip address to connect to my SSH port.
First we delete the old – “allow all” SSH rule
sudo ufw disable
sudo ufw delete allow ssh
Then we add ip address to be allowed to connect to SSH port
sudo ufw allow from 192.168.20.40 to any port ssh
Alternatively, you could also specify port number and protocol
sudo ufw allow from 192.168.20.40 to any port 22 proto tcp
Only allow SSH connections from certain subnets
sudo ufw allow from 192.168.20.0/24 to any port 22 proto tcp
Note: Adding firewall rules to only allow SSH connection from certain subnets would increase the server security, further reducing brute-force attack.


