Howto install OwnCloud with NGINX in Ubuntu LTS

OwnCloud is a PHP-based Cloud-storage web application for remote storage with file synchronization capabilities.

Step 1
You need to install several packages in order to configure OwnCloud with nginx in your server

sudo apt-get -y install nginx-full php5-fpm php5-sqlite

Step 2: Download Owncloud
Download Owncloud, replace $OWNCLOUD_VER with the latest Owncloud version.

export OWNCLOUD_VER="8.1.0"
cd /var/www/
sudo wget -c https://download.owncloud.org/community/owncloud-${OWNCLOUD-VER}.tar.bz2

Step 3: Extract Owncloud
This will extract owncloud to /var/www/owncloud/

cd /var/www/
tar jxvf owncloud-${OWNCLOUD-VER}.tar.bz2

Step 4: Setup Nginx
You need to setup NGINX

cd /etc/nginx/sites-available
sudo nano -c /etc/nginx/sites-available/owncloud

Step 4a: Setup ‘owncloud’ nginx site

Please change server_name directive to your own ip address or your own domain.
You can also download textfile and upload it directly to your server: http://pastebin.com/2P8h1zNB

#
#/etc/nginx/sites-available/owncloud
# 
server {
  listen 80;
server_name cloud.example.com;
server_name 192.168.1.47;

  # Path to the root of your owncloud installation
  root /var/www/owncloud/;
  # set max upload size
  client_max_body_size 10G;
  fastcgi_buffers 64 4K;

  # Disable gzip to avoid the removal of the ETag header
  gzip off;

  # Uncomment if your server is build with the ngx_pagespeed module
  # This module is currently not supported.
  #pagespeed off;

  rewrite ^/caldav(.*)$ /remote.php/caldav$1 redirect;
  rewrite ^/carddav(.*)$ /remote.php/carddav$1 redirect;
  rewrite ^/webdav(.*)$ /remote.php/webdav$1 redirect;

  index index.php;
  error_page 403 /core/templates/403.php;
  error_page 404 /core/templates/404.php;

  location = /robots.txt {
    allow all;
    log_not_found off;
    access_log off;
    }

  location ~ ^/(?:\.htaccess|data|config|db_structure\.xml|README){
    deny all;
    }

  location / {
   # The following 2 rules are only needed with webfinger
   rewrite ^/.well-known/host-meta /public.php?service=host-meta last;
   rewrite ^/.well-known/host-meta.json /public.php?service=host-meta-json last;

   rewrite ^/.well-known/carddav /remote.php/carddav/ redirect;
   rewrite ^/.well-known/caldav /remote.php/caldav/ redirect;

   rewrite ^(/core/doc/[^\/]+/)$ $1/index.html;

   try_files $uri $uri/ /index.php;
   }

   location ~ \.php(?:$|/) {
   fastcgi_split_path_info ^(.+\.php)(/.+)$;
   include fastcgi_params;
   fastcgi_param SCRIPT_FILENAME $document_root$fastcgi_script_name;
   fastcgi_param PATH_INFO $fastcgi_path_info;
	  fastcgi_pass unix:/var/run/php5-fpm.sock;
   }

   location ~* \.(?:jpg|jpeg|gif|bmp|ico|png|css|js|swf)$ {
       expires 30d;
       # Optional: Don't log access to assets
         access_log off;
   }

  }

Step 4b: Enable ‘owncloud’ settings

cd /etc/nginx/sites-enable/
sudo ln -sf ../sites-available/owncloud .
nginx -t
service nginx restart
service php5-fpm restart

Step 5: Finishing off Owncloud setup

cd /var/www/
mkdir /var/www/owncloud/data
chmod 0770 /var/www/owncloud/data
chmod 0770 /var/www/owncloud/lib/private/
sudo chown -R www-data.www-data /var/www/owncloud

Step 6: Goto the IP-Address or domain name of your owncloud installation

First screen
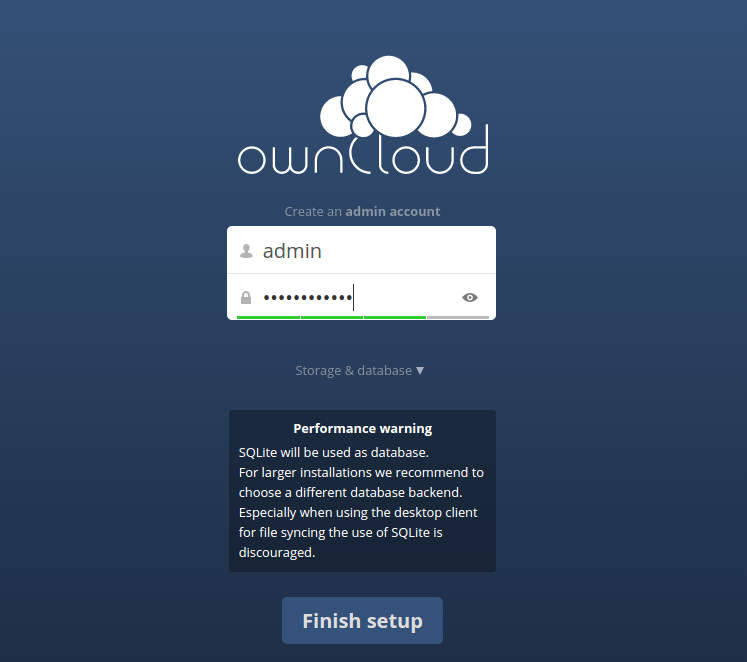
setup-owncloud-first

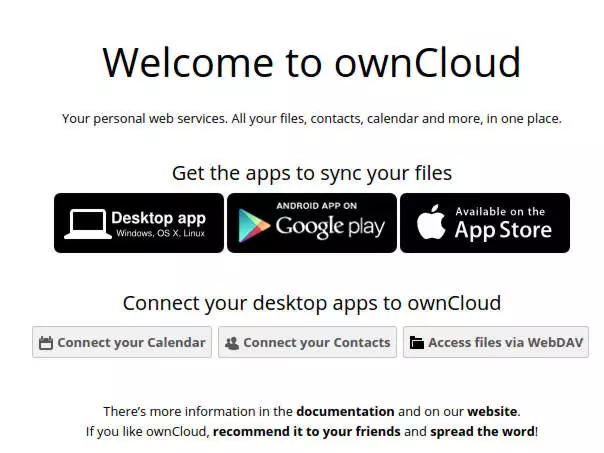
Welcome to Owncloud
welcome-to-owncloud

Owncloud File Manager and Settings
owncloud-filemanager

What’s Next?

After completing installation you may:

  1. Install Android, iPhone or Desktop client to sync all your files
  2. Install TLS/SSL Certificates to secure your Owncloud connection
  3. Install MariaDB/MySQL for efficient synchronization

Warning: Do not enable Pagespeed and SPDY in OwnCloud

OwnCloud servers does not support PageSpeed and SPDY module, so please disable those extension if its exists within your nginx configuration.

Recommended Owncloud book

How to install NGINX with PageSpeed module in Ubuntu LTS / Debian

UPDATE: You can now install NGINX with PageSpeed in Ubuntu LTS with deb package: https://blog.mypapit.net/2015/08/install-nginx-with-pagespeed-using-deb-for-ubuntu-lts-amd64.html

INSTALLING NGINX USING UBUNTU APT-GET SOURCE
PageSpeed modules are open source modules developed by Google Inc that can perform website optimization to ensure faster site delivery, automatically.

PageSpeed module is not included in NGINX installation in Ubuntu or Debian. So you need to recompile NGINX together with PageSpeed module, to enable its functionality.

You can install NGINX 1.8.0 with PageSpeed for Ubuntu 14.04 LTS here, using dpkg:
or you can compile it from source code using apt-get.

There are several steps to this method, first you need to get the latest nginx stable (or mainline) from PPA (optional)

#this step is optional, only if you want to get the latest Ubuntu version of nginx

sudo apt-get -y install software-properties-common

sudo -s

nginx=stable # use nginx=development for latest development version
add-apt-repository ppa:nginx/$nginx

apt-get update 

apt-get -y upgrade

Then, you’ve to install dpkg-dev, unzip utility and nginx source from apt repository

apt-get -y install dpkg-dev unzip

apt-get install nginx

apt-get source nginx

After that, you need to download PageSpeed module, this instruction is adapted from

https://developers.google.com/speed/pagespeed/module/build_ngx_pagespeed_from_source

**note replace ${NGINX_VERSION} with the version of NGINX available from apt-get, in my case – its “1.8.0”

cd
export NPS_VERSION=1.9.32.4
export NGINX_VERSION=1.8.0

wget -c https://github.com/pagespeed/ngx_pagespeed/archive/release-${NPS_VERSION}-beta.zip

unzip release-${NPS_VERSION}-beta.zip

cd ngx_pagespeed-release-${NPS_VERSION}-beta/

wget -c https://dl.google.com/dl/page-speed/psol/${NPS_VERSION}.tar.gz

tar -xzvf ${NPS_VERSION}.tar.gz

cd nginx-${NGINX_VERSION}

Install all build dependencies (your configuration may varies, but i keep it within default Ubuntu configuration.

apt-get -y install libpcre3-dev libssl-dev libxslt1-dev libgd-dev libgeoip-dev geoip-bin geoip-database libpam0g-dev zlib1g-dev memcached

Then configure nginx, remember to replace ${NGINX_VERSION} with your current version of NGINX. In my case, its “1.8.0”

cd nginx-${NGINX_VERSION}

./configure  --with-cc-opt='-g -O2 -fPIE -fstack-protector --param=ssp-buffer-size=4 -Wformat -Werror=format-security -D_FORTIFY_SOURCE=2' --with-ld-opt='-Wl,-Bsymbolic-functions -fPIE -pie -Wl,-z,relro -Wl,-z,now' --prefix=/usr/share/nginx --conf-path=/etc/nginx/nginx.conf --http-log-path=/var/log/nginx/access.log --error-log-path=/var/log/nginx/error.log --lock-path=/var/lock/nginx.lock --pid-path=/run/nginx.pid --http-client-body-temp-path=/var/lib/nginx/body --http-fastcgi-temp-path=/var/lib/nginx/fastcgi --http-proxy-temp-path=/var/lib/nginx/proxy --http-scgi-temp-path=/var/lib/nginx/scgi --http-uwsgi-temp-path=/var/lib/nginx/uwsgi --with-debug --with-pcre-jit --with-ipv6 --with-http_ssl_module --with-http_stub_status_module --with-http_realip_module --with-http_auth_request_module --with-http_addition_module --with-http_dav_module --with-http_geoip_module --with-http_gunzip_module --with-http_gzip_static_module --with-http_image_filter_module --with-http_spdy_module --with-http_sub_module --with-http_xslt_module --with-mail --with-mail_ssl_module --add-module=debian/modules/nginx-auth-pam --add-module=debian/modules/nginx-dav-ext-module --add-module=debian/modules/nginx-echo --add-module=debian/modules/nginx-upstream-fair --add-module=debian/modules/ngx_http_substitutions_filter_module --sbin-path=/usr/local/sbin --add-module=$HOME/ngx_pagespeed-release-${NPS_VERSION}-beta

After that, run make and make install

make

make install

The newly compiled nginx will be installed in “/usr/local/bin” without overwriting the original binary file.

Create nginx-pagespeed /etc/init.d file

Optionally you may duplicate nginx in init.d, and rename it to nginx-pagespeed, and stop the original nginx server

cp /etc/init.d/nginx /etc/init.d/nginx-pagespeed

sed -i 's|/usr/sbin/nginx|/usr/local/sbin/nginx|g' /etc/init.d/nginx-pagespeed

service nginx stop

You may also enable basic PageSpeed config in /etc/nginx/conf.d/

nano /etc/nginx/conf.d/pagespeed.conf

And add these basic PageSpeed config

#file /etc/nginx/conf.d/pagespeed.conf
        pagespeed on;
        pagespeed FetchWithGzip on;

        pagespeed FileCachePath /run/shm/pagespeed_cache;
        pagespeed RewriteLevel CoreFilters;

Save the file, and test nginx config, after that, start nginx-pagespeed service.

/usr/local/sbin/nginx -t

service nginx-pagespeed start

**Note: This instruction has been tested under Ubuntu 14.04 LTS with nginx 1.8.0 from ppa:nginx/stable respository. The LTS is chosen because it has much longer support for server, and nginx 1.8.0 supports both spdy 3.1 and latest PageSpeed.

***Please share any thoughts or opinion or suggested correction if this guide didn’t work for you. Thanks!!

Recommended Reading

Google Nexus 7 running on Ubuntu 13.04 Raring Ringtail

Here is the video showing Ubuntu 13.04 Raring Ringtail (still in development at this time of writing) running on Nexus 7, a 7.81″ tablet which runs Android Jelly Bean by default.

It is expected that more announcement will be made regarding Ubuntu tablet at the upcoming Ubuntu Developer Summit (UDS) in Denmark, which Mark Shuttleworth himself drop a hint that future Ubuntu development will focused on mobile platform. He even encouraged attendees to bring Nexus 7 to the summit.

My Thoughts
Its refreshing to see Ubuntu can be ported on tablets. It open up several opportunities to integrate Ubuntu operating system with mobile platform and together with the possibility of cloud computing, it will be able to unify the way people use their computers in their daily life. However, a new GUI has to be designed in order to make Ubuntu usable and convenient to be used on tablets.

All in all, it is a bold move from Canonical.

How to convert between sqlite2 and sqlite3 database

Here’s a short guide on how to convert between sqlite2 to sqlite3 database file:

sqlite2 /path/to/mysqlite2.db .dump > backupfile
sqlite3 /path/to/mynewsqlite3.db < backupfile

Using the same method, you can convert sqlite3 db to sqlite2 db too!

p/s: Why you need to convert? because embedded device (read: iPhone and Android) only supports sqlite3 database, while PHP 5 by default supports sqlite2 database.

Thus, this method provide a convenient way to convert between the two different version of sqlite db format.

Recommended Reading

Generate EAN,UPC,ISBN barcodes in Ubuntu / Debian Linux

barcode‘ is a utility in Debian GNU/Linux distribution used for generating common 1-D barcode: EAN-13, EAN-8, UPC, ISBN, code93, code128 & codabar.
barcode outputs file in postscript format which can be converted to PDF with the ‘ps2pdf‘ utility

Usage:

1. Outputs isbn barcode and converts it to PDF file

$  barcode -o barcode.ps -e isbn
$  ps2pdf barcode.ps

2. Outputs EAN-13 barcode

$ barcode -o barcode-ean.ps -e ean

If you are looking for a tool that could generate QR Code, then you can try ‘qrencode

Ubuntu 12.04 LTS Precise Pangolin Latest New Features

The latest Ubuntu 12.04 LTS is going to be released in (28 April 2012), that is less than a week! The latest features of Precise Pangolin are:

1. Linux Kernel
Ubuntu 12.04 will use a kernel based on the 3.2.12 upstream Linux kernel, which include a patch that makes Linux powered laptop consumes more efficiently

2. HUD – Intelligent search feature in Ubuntu 12.04
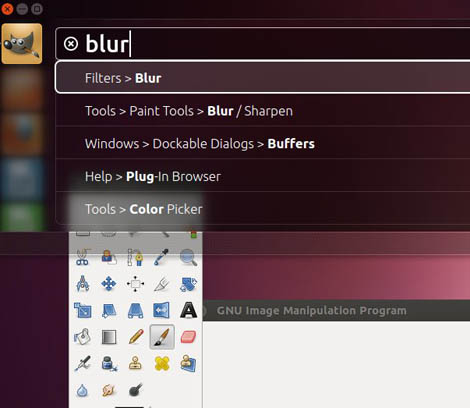
Stands for Heads-up Display, HUD can be used to search for items in the menu bar in most applications. For example, if you are looking for a particular menu (or functionality) in GIMP, but can’t quite recall its position, you can use HUD to search it. Pictured here here is an attempt to search for ‘Blur’ filter for GIMP.

Ubuntu HUD

Currently HUD only works with application that supported Global menu, which means you can’t use it in LibreOffice.

3. Rhythmbox replaced Bansee as the default multimedia player
A decision came during the last Ubuntu Developer Summit (UDS). This move is connected to the new community decision to remove Mono and any application that depends on it from the default installation.

Another casualty is Tomboy note-taking application and gbrainy (game) which also depends on Monoi

**personally, I find depending on Mono application could be problematic, moreover those applications aren’t taking advantage of the ‘portability’ of the .NET platforms (It can’t be used on Microsoft Windows either, not without extensive hacking). So what’s the use of including Mono application on Ubuntu, except for bloating distros?

4. Global Privacy Settings
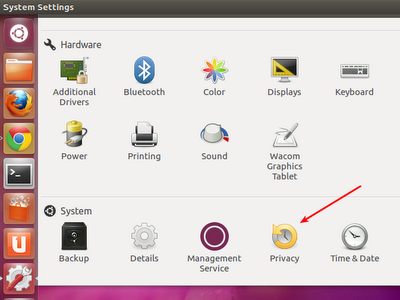
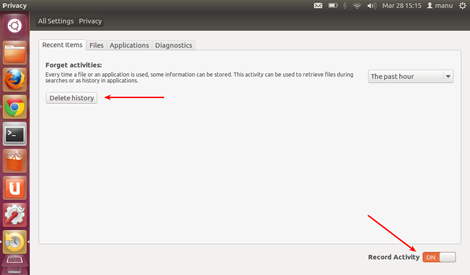
Ubuntu 12.04 LTS features “Privacy” option in the System Settings screen. The new Privacy Menu gives users the option of turning off History recording for users activities with a click of a menu.

Privacy 1

Privacy 2

Users may also disable activity recording for a specific group of applications (Instant Messaging, Web browsing, Office Documents, Emails and Multimedia), note that this option *MAY* only work on application that comes with Ubuntu default-installation.

5. Ubuntu *.ISO installer will exceed CD-ROM size
CD-ROM was used as installers on computer platform since 1994, back then the 650MB storage was larger than the average hdd capacity of around 320MB-500MB. The practice of releasing CD-sized ISO have since followed Linux distro for years, well after DVD drive and DVD-writers have become common.

Starting with Ubuntu Precise Pangolin (12.04 LTS), Ubuntu *.iso sizes will not fit CD-ROM anymore. it’s ISO size is estimated to be around 750MB to 800MB. Users may burn the ISO on DVD or use utilities such as UNetBootin to create bootable USB Drive.

My Thoughts
I think Ubuntu is going strong on this release with vast improvements on the usability, especially on the aspect of the UI user-friendliness to those who are new to GNU/Linux. However, I still thinks that Unity UI (and to the extend, the Ubuntu Software Center) is VERY SLOW even when running on a modern system as it took about 10 seconds to load Ubuntu Software Center.

Frankly, I think Ubuntu and the general GNU/Linux desktop community should improve the perceived latency of its UI first in order to persuade people to use open source operating system.

Source: