Bash code for analyzing web server traffic to determine which ip accessed the web server the most

#!/bin/bash
# Check if a log file was specified
if [ "$#" -ne 1 ]; then
echo "Usage: $0 access.log"
exit 1
fi
LOG_FILE="$1"
if [ ! -f "$LOG_FILE" ]; then
echo "Error: Log file does not exist."
exit 1
fi
TOP_IPS=10
# Analyze the log file to find the top IP addresses
echo "Analyzing the log file to find the top $TOP_IPS IP addresses..."
awk '{print $1}' "$LOG_FILE" | sort | uniq -c | sort -nr | head -n "$TOP_IPS" | awk '{print "IP: " $2 ", Access Count: " $1}'

This handy script is useful for webserver traffic analysis task. It can be use to detect abusive IP address or spambots which accesses the webserver.

ystem administrators can utilize the generated list of IP addresses to enhance webserver security by blocking those IPs deemed potentially harmful or suspicious.

Share files quickly using python3

You can enable quick file sharing using python3 by activating its built-in internal webserver


python3 -m http.server

The default webserver will listen to port 8000, you can change to any port above 1024 without root privileges by specifying the port number after the command:

python3 -m http.server 9090

Check if your web server supports Brotli Compression

Brotli is a new compressed data format developed by Google for compressing web data. It is documented in RFC7932. Currently, almost all modern web browser support Brotli which compressed better and faster than Deflate.

Brotli is can be enabled in most popular web server including:

  • Apache HTTPD – through mod_brotli (for release after 2.4.26)
  • Nginx – ngx_brotli (provided by Google)
  • Node.js (trough shrink-ray module
  • LightSpeed (since version 5.2)
  • Microsoft IIS (through IIS-brotli extension, for IIS 7.5 and above)

Testing for Brotli Support

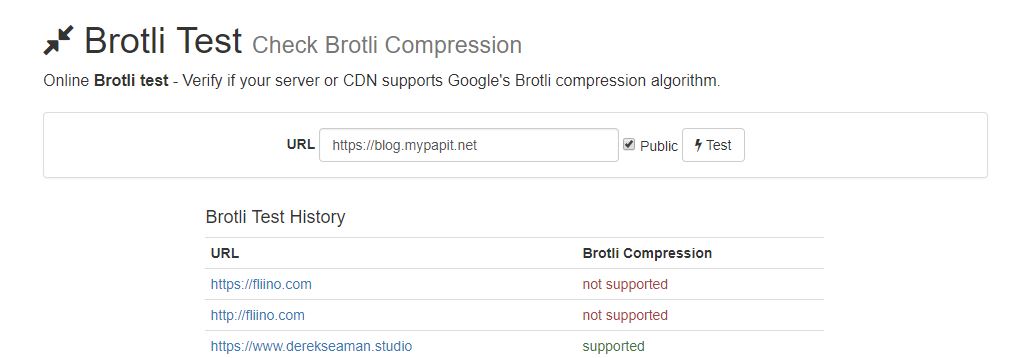
KeyCDN.com has provided a tool for testing whether your website supports Brotli compression.

You can go over the website and get your server tested. For nginx webserver, ngx_brotli will automatically downgrade to gzip if the browser does not support brotli encoding


How to analyze 404 HTTP code from weblogs

The dreaded 404 HTTP code means page not found. However multiple 403 and 404 on weblogs also can also mean there are attempts to crack the website.

The awk script down here can be useful tool to analyze weblogs and identify multiple attempts at cracking the web application.


awk '($9 ~ /404/)' access.log | awk '{print $7}' | sort | uniq -c | sort -n

The script can also be tweaked for other HTTP status code too.

How to set Android *.apk mime-type for Nginx web server

Here’s a simple guide on how to add the correct mime-type for Android APK file for Nginx webserver.

sudo nano /etc/nginx/mime.types

In “mime.types” file, add this line within the “types” block

types {
     ...
     ...
     application/vnd.android.package-archive     apk;
     ...
     ...
}
     

Restart nginx server

sudo service nginx restart

Done!

Generating TLS/SSL Self Signed Certificate for Nginx in Ubuntu LTS

This post concerns on generating self-signed TLS/SSL certificate for Nginx in Ubuntu LTS and assumes that you’ve configured nginx server with a default site.

Step 1: Generate OpenSSL certificate

sudo mkdir /etc/nginx/ssl
sudo openssl req -x509 -nodes -days 365 -newkey rsa:2048 -keyout /etc/nginx/ssl/nginx.key -out /etc/nginx/ssl/nginx.crt
You are about to be asked to enter information that will be incorporated
into your certificate request.
What you are about to enter is what is called a Distinguished Name or a DN.
There are quite a few fields but you can leave some blank
For some fields there will be a default value,
If you enter '.', the field will be left blank.
-----
Country Name (2 letter code) [AU]:US
State or Province Name (full name) [Some-State]:CA
Locality Name (eg, city) []:Palo Alto
Organization Name (eg, company) [Internet Widgits Pty Ltd]:Mypapit LLC
Organizational Unit Name (eg, section) []:Billing
Common Name (e.g. server FQDN or YOUR name) []:Mypapit
Email Address []:mypapit+cert@gmail.com

Step 2: Edit nginx site config

You can edit nginx site config here, replace ‘default’ with your own server config.

sudo nano -c /etc/nginx/sites-enable/default

You will see this server block.

server {
        listen 80;
        listen [::]:80;
        server_name your_domain.com;
        root /var/www/your_domain.com;
        index index.html index.htm;

...
...
}

Add additional line (in italic)

server {
        listen 80;
        listen [::]:80;

    listen 443 ssl;

       server_name your_domain.com;
        root /var/www/your_domain.com;
      index index.html index.htm;

        ssl_certificate /etc/nginx/ssl/nginx.crt;
        ssl_certificate_key /etc/nginx/ssl/nginx.key;
        ssl_protocols TLSv1 TLSv1.1 TLSv1.2;
        ssl_prefer_server_ciphers on;
        add_header Strict-Transport-Security max-age=31536000;


...
...
}

Save file, and restart nginx server

sudo nginx -t
sudo service nginx restart

Test configuration by going to https://your_domain.com.

Done!

Bonus: Add HSTS header and Serve only TLS

HSTS header