I’ve put my latest project on GitHub: renogybt-emulator, a Python library and command-line tool that emulates the Bluetooth interface exposed by Renogy BT-1 and BT-2 modules connected to an MPPT solar charge controller.
The aim is to make it easier to develop and test solar-monitoring software without needing a physical controller, solar panels or batteries on the desk.
TLDR; This software make a Linux computer behave like a Renogy solar charge controller over Bluetooth, so you can test your apps without physical solar equipment.
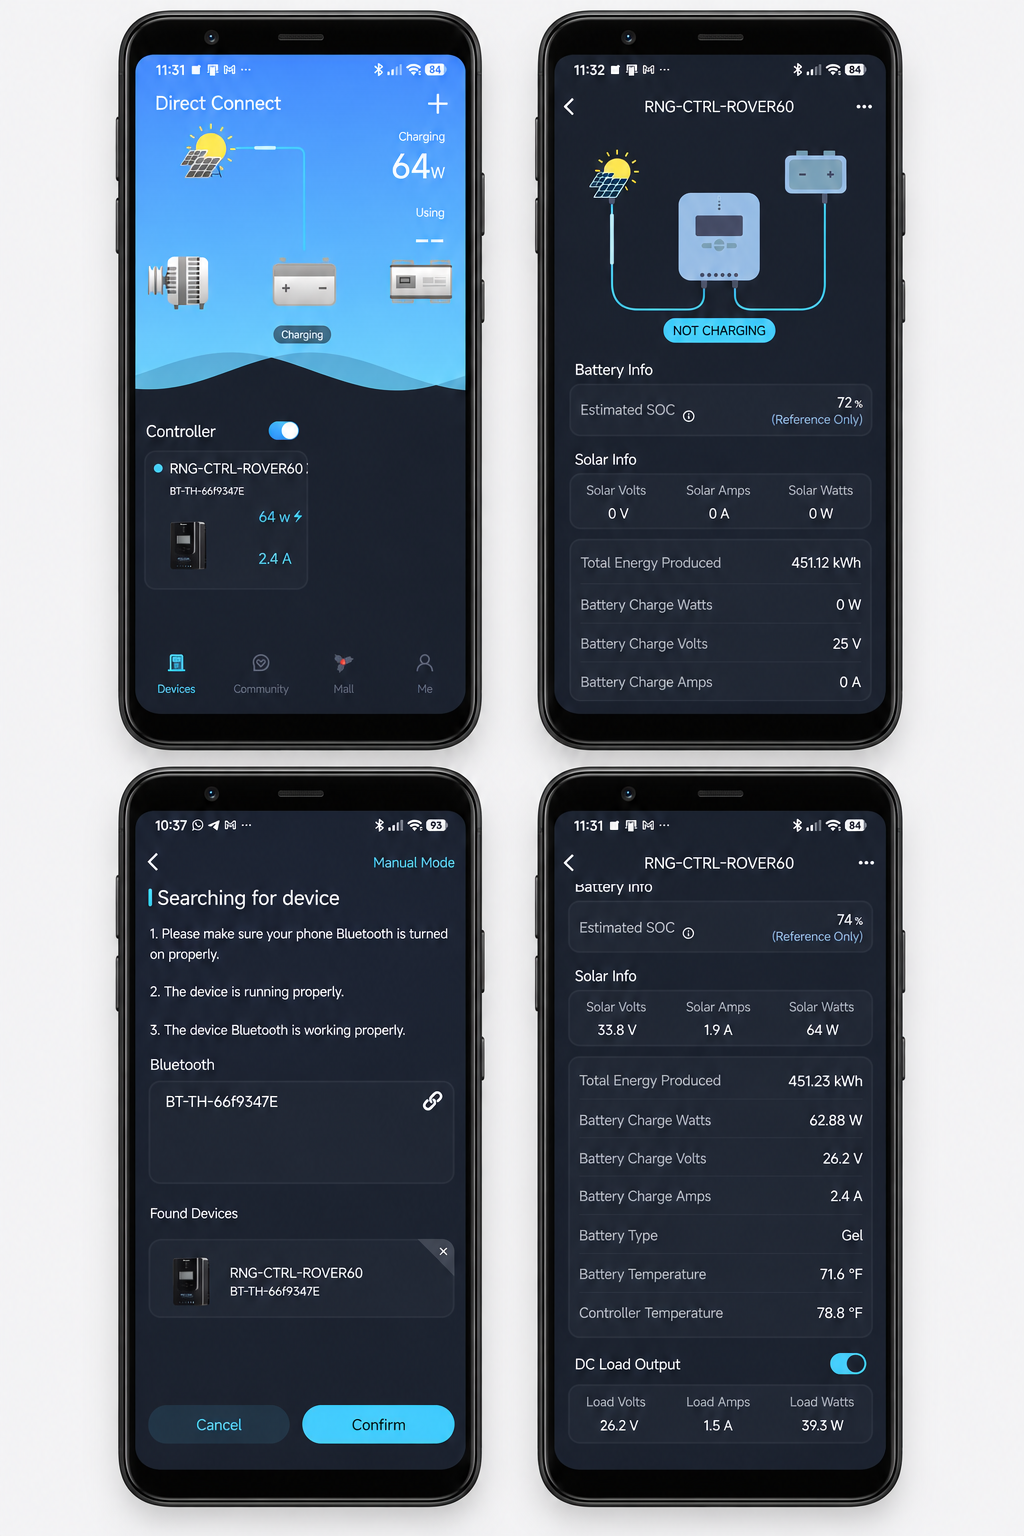
Demo Screenshots From Official Renogy Mobile Application
How it works
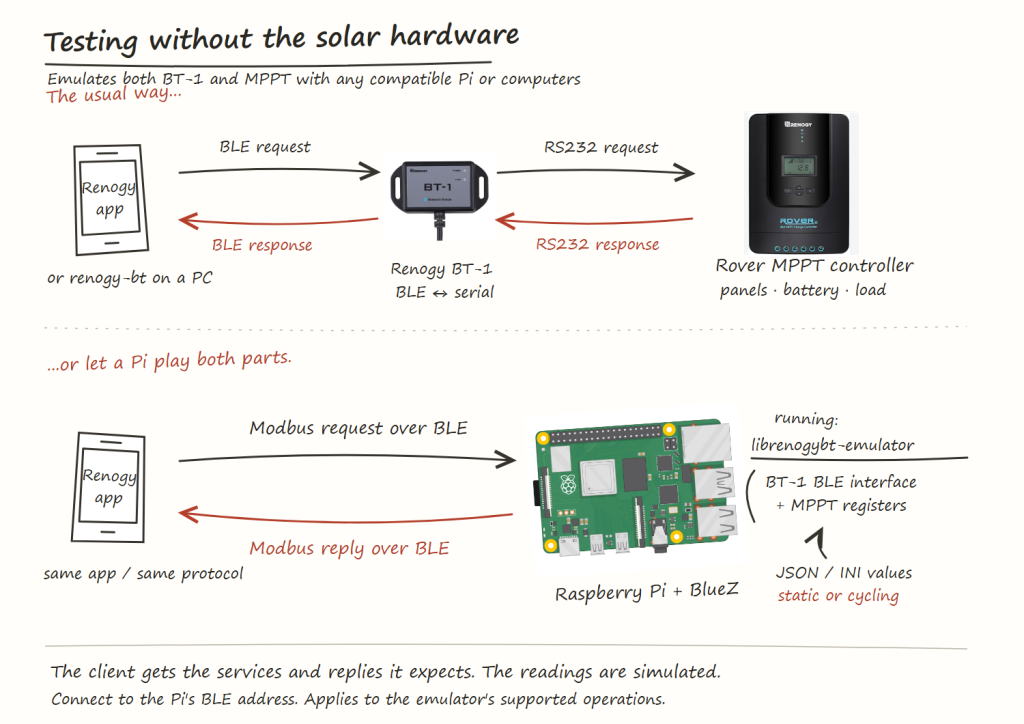
The BT-1 and BT-2 modules provide Bluetooth Low Energy (BLE) access to Renogy equipment, using RS232 and RS485 respectively on the controller side. My emulator runs on a Linux computer with a BLE adapter and presents the Bluetooth services and simulated controller data that a compatible client expects.
Underneath, it implements the BLE GATT services and characteristics used for communication, together with a Modbus RTU responder. A client sends a request over Bluetooth, and the emulator replies with values from its simulated register bank. Those values include battery voltage, charging current, solar power, temperatures and load status.
This lets a monitoring application connect to an emulated device and exercise its normal communication path.
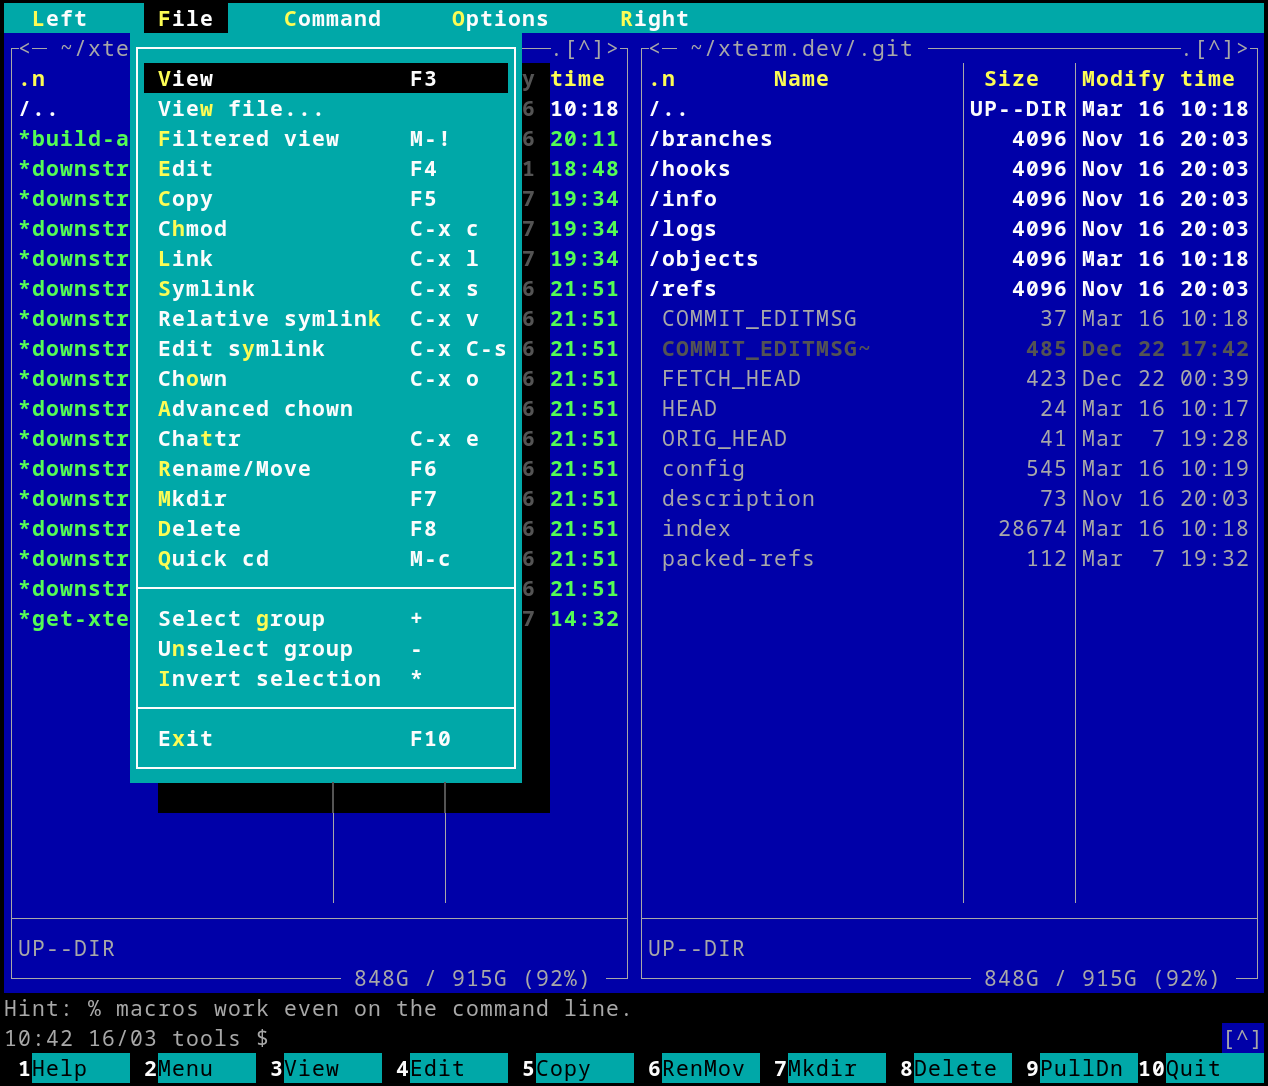
Some Linux tools bring back memories as soon as you open them. Midnight Commander is one of those tools. Its familiar blue panels, text menus, and function keys recall the days when managing files in a terminal was an ordinary part of using a computer.
Known simply as mc, GNU Midnight Commander is a terminal file manager with two directory panels. Open your source folder on one side and the destination on the other, then browse and copy files using the keyboard.
For anyone who remembers DOS-era file managers, this layout feels familiar. The available actions appear along the bottom of the screen, and the keyboard does most of the work. There is something satisfying about seeing both folders at once and moving through them without repeatedly typing ls and cd.
Midnight Commander also remains useful when working on a Linux server through SSH. It runs inside the terminal, so you can browse directories, inspect files, and organise folders without opening a graphical desktop. It includes a file viewer and an editor, too.
How to install Midnight Commander on Ubuntu
Install it using Ubuntu’s package manager:
sudo apt update
sudo apt install mc
Then launch it:
mc
Start with these shortcuts, documented in the official manual:
Key
Action
Tab
Switch between panels
F1
Open help
F3
View a file
F4
Edit a file
F5
Copy files
F6
Move or rename files
F7
Create a directory
F8
Delete files
F10
Quit
Modern desktops have changed how we manage files, but this old style still has its appeal. Two panels, clear actions, and a keyboard within reach are enough to make routine file management comfortable. If you have not used Midnight Commander for years, try typing mc again.
Renogy BT-1 telemetry provides useful information for monitoring the condition and performance of a solar photovoltaic system. It can report key values such as PV voltage, current, power generation, battery status, controller temperature, charging activity, and load consumption. These data are important for building dashboards, alerts, databases, and automation systems.
However, developing and testing such a monitoring system normally requires access to real Renogy hardware, including a compatible charge controller and BT-1 Bluetooth module. This can make early development difficult, especially when developers need to reproduce specific conditions such as low battery voltage, peak sunlight, nighttime discharge, or controller inactivity.
My latest open-source project, Renogy BT-1 Telemetry Simulator, removes this hardware requirement.
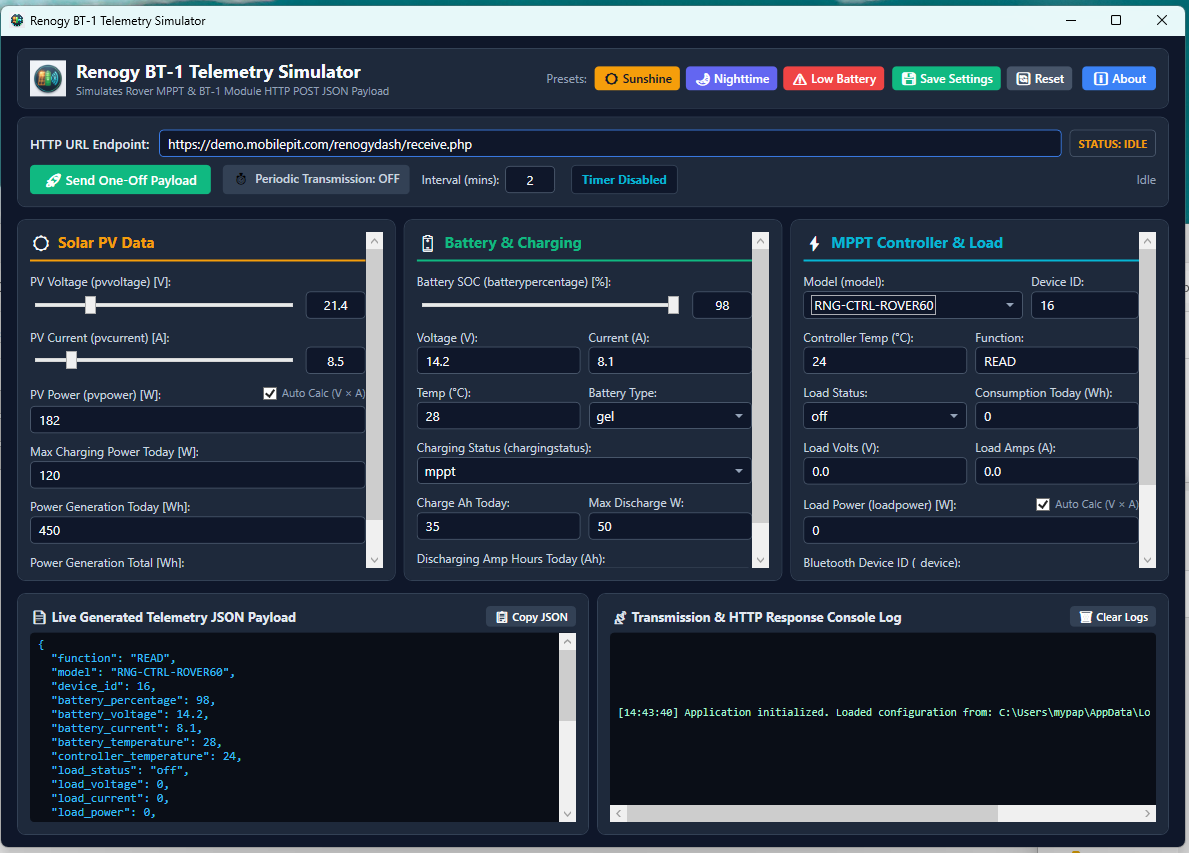
Application Screenshot
The Renogy BT-1 Telemetry Simulator addresses this problem by generating realistic sample telemetry and sending it as JSON to an HTTP or HTTPS endpoint without requiring physical solar equipment.
The simulator imitates telemetry commonly produced by a Renogy BT-1 module connected to a Renogy Rover MPPT charge controller.
You can manually configure values such as:
Solar PV voltage, current, power, and generated energy
Battery percentage, voltage, current, temperature, and battery type
Controller temperature and charging status
Load voltage, current, power, and energy consumption
Controller model, device ID, and BT-1 identifier
The application can also calculate PV and load power automatically.
Renogy BT-1 Telemetry Simulator Use Cases
The simulator is useful for testing the Solar PV under various situations:
Peak Sunshine
Nighttime operations
Low battery conditions
Heavy loads / light loads
Application Features
One-off HTTP Post transmission
Periodic transmission at a configurable interval
A default two-minute sending interval
Live JSON payload preview
Transmission logs with HTTP status, response, errors, and request duration
This is useful for testing local development servers, webhooks, staging systems, database storage, monitoring dashboards, and automated alerts before installing physical solar hardware.
Requirements
The application uses WPF and .NET 8, so it runs on Windows 10 or Windows 11. Developers can build it using Visual Studio 2022 or the standard dotnet command-line tools.
The current HTTP client accepts self-signed HTTPS certificates for local testing. This behaviour should not be treated as secure certificate validation for production systems.
Download the Source Code
Renogy BT-1 Telemetry Simulator is available on GitHub:
The project is released under the GNU General Public License version 3, allowing users to study, modify, and redistribute the source code according to the GPL terms.
This project is an independent simulator and is not an official Renogy product.
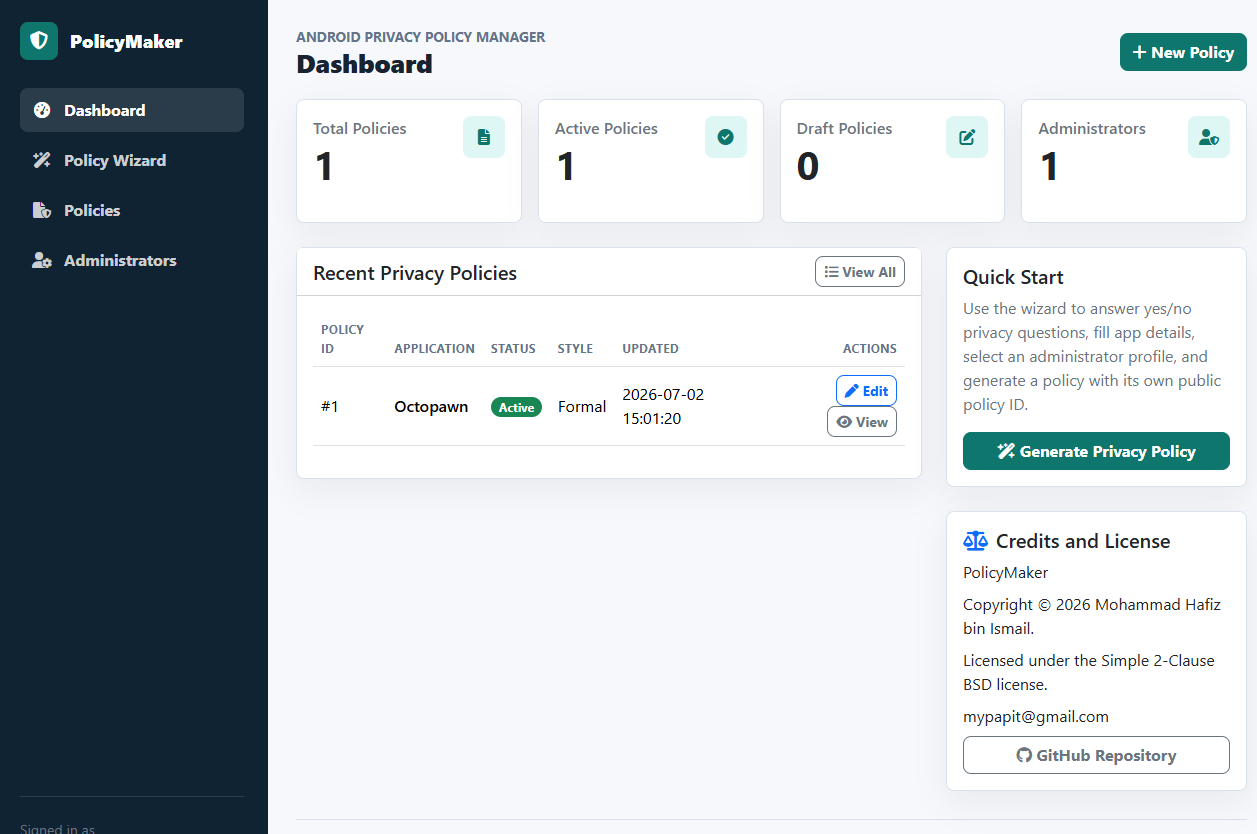
PolicyMaker is a lightweight web application for creating, managing, publishing, and displaying privacy policies for Android mobile applications. It is built using PHP and SQLite, so it does not need a heavy database server or complex deployment setup. The project is available on GitHub – https://github.com/mypapit/policymaker
PolicyMaker Dashboard
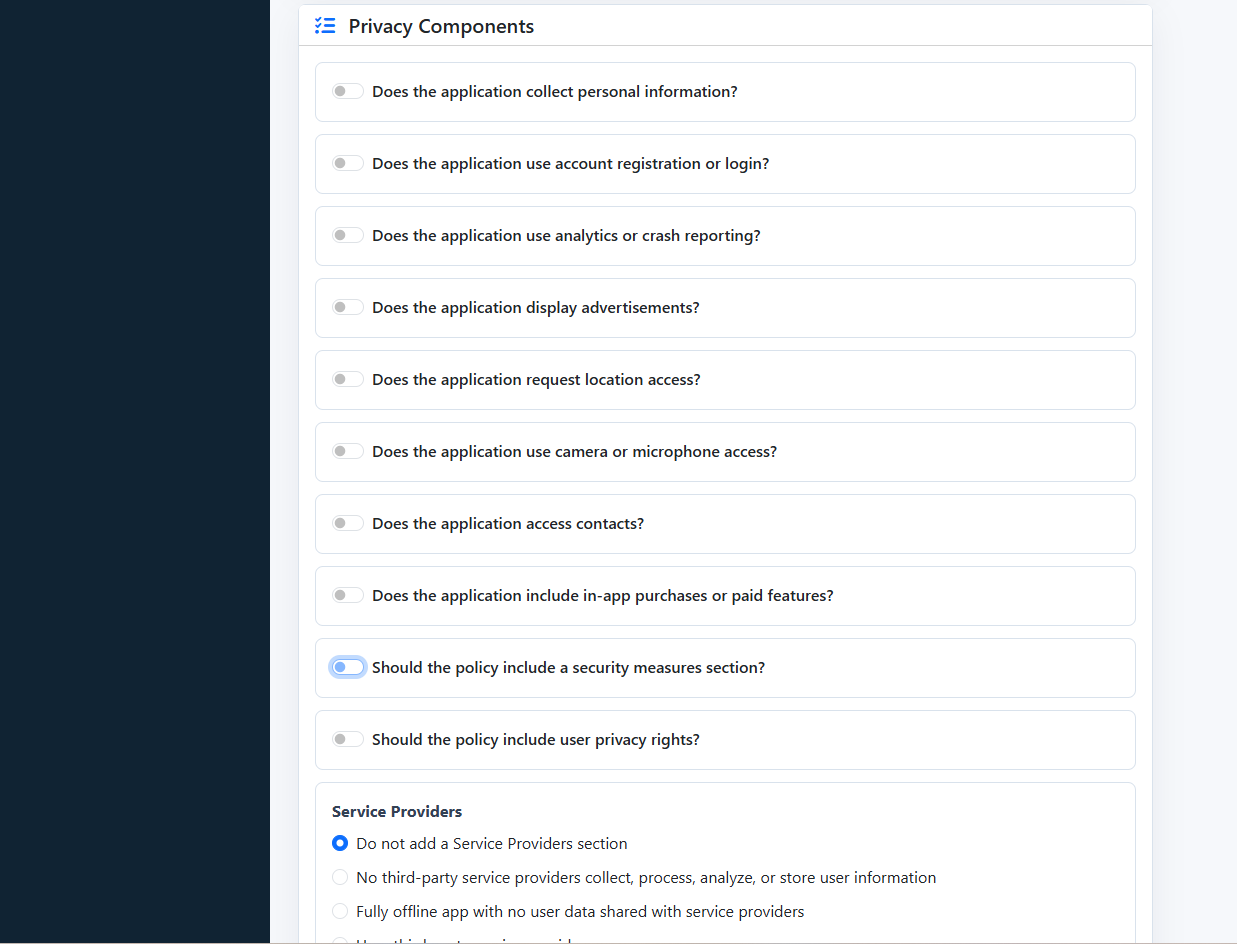
PolicyMaker Wizard
The main idea behind PolicyMaker is simple. Many Android developers need a public privacy policy page, especially when publishing applications to app stores. Instead of manually writing and formatting the same policy structure again and again, PolicyMaker provides an administrator-only wizard that helps generate structured privacy policy text from simple inputs.
The wizard supports yes/no choices, radio buttons, checkboxes, and text fields. It can collect details such as application name, package name, website, effective date, personal data collection, analytics, advertising, permissions, service providers, data retention, security, user rights, and children’s privacy.
PolicyMaker is useful for small developers, indie Android publishers, educators, and small organizations that manage several simple mobile apps. It is not meant to be a large enterprise compliance platform. Its strength is that it is small, direct, and easy to host. It only requires PHP 8.3 or newer with SQLite/PDO SQLite support. The installer creates the SQLite database and generates the first administrator password.
The public policy pages also include Schema.org JSON-LD metadata, which helps make the policy page more structured for search engines
PolicyMaker is licensed under the BSD 2-Clause license. This makes it practical for developers who want a small self-hosted privacy policy system that can be modified and deployed with minimal restriction.
It seems Google have implemented private prefetch proxy in Chrome for Android.
The upside of this private prefetch proxy is improved browsing experience for mobile users by reducing waiting time for web pages to load.
The downside is, as web server administrators – you might find a lot of 404 status in your web logs.
To solve this, you could either :
Write directive to ignore 404 logs for “traffic-advice”
Create “/.well-known/traffic-advice file for each domain and set the file to be served with “application/trafficadvice+json” MIME type [source]
Solution
Luckily, TechTitBits have come up with a convenient solution which only involves adding a few lines in configuration files to enable Chrome for Android prefetched proxy in nginx.
A lot of people struggling in configuring PKP Open Journal System 3 (OJS3) to run behind nginx reverse proxy as OJS3 does not support nginx natively
So most implementation would settle with Apache HTTPD server or install it behind nginx reverse proxy.
However the problem is that the OJS3 behave badly when placed behind nginx reverse proxy, especially when the reverse proxy is using HTTPS / TLS. This messed up the based URL in the OJS3, subsequently causing some resources from the website to be unavailable.
To solve this, you only need to add a single line in the Apache HTTPD site configuration file.