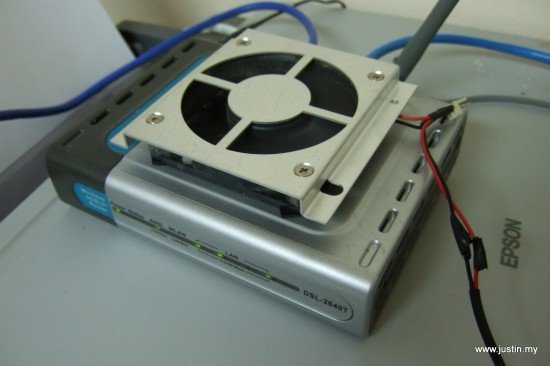
Here is some solution for overheating Wireless Router. Note that I do not own any of these photos.


Source: http://www.boransat.net/board/index.php?topic=28537.0

Free and Open Source blogger with an attitude
Here is some solution for overheating Wireless Router. Note that I do not own any of these photos.
Source: http://www.boransat.net/board/index.php?topic=28537.0
You can convert an old pc into router with pfSense.
Uncomplicated Firewall (UFW) is a helper tool which allows you to quickly setup iptables firewall in any Ubuntu server. It is installed by default and it allows you to secure your server at no time!
Basic UFW: Check Status
You can check UFW by running this command. The verbose argument prints additional information such as UFW profiles, logging settings.
The ‘numbered’ argument prints the list of rules with line number. I’ll explain later on the use of this feature.
sudo ufw status
sudo ufw status verbose
sudo ufw status  numbered
Basic UFW: Enable and Disable Firewall
You can easily enable and disable firewall by specifying ‘disable’ and ‘enable’ argument.
Warning : Please do not enable UFW if you’re connecting using SSH connection to your Ubuntu box, you might be disconnected.
sudo ufw disable
sudo ufw enable
Basic UFW: Setting up default rule and Enabling SSH
A lot of you might be connecting to Ubuntu box using SSH connections, so the first step is to setup a default rule and enabling SSH connection.
Deny incoming connection
sudo ufw default deny incoming
Allow incoming SSH connection
sudo ufw allow ssh
Alternatively you can write:
sudo ufw allow 22/tcp
Finally, enable firewall
sudo ufw enable
You can check the firewall rules by running
sudo ufw status
Basic UFW: Enabling other service: HTTP, HTTPS
Enabling web server port and https is as easy as running
sudo ufw allow http
sudo ufw allow https
Basic UFW: Deleting rule
You can delete UFW rule by running
sudo ufw delete allow https
or by specifying its port and protocol
sudo ufw delete allow 443/tcp
Additionally you could also delete rule using its number by running “ufw status numbered” first
sudo ufw status numbered
ufw status numbered
Status: active

     To                         Action      From
     --                         ------      ----
[ 1] 22                         ALLOW IN    Anywhere
[ 2] 22/tcp                     ALLOW IN    Anywhere
[ 3] 443                        ALLOW IN    Anywhere
[ 4] 22 (v6)                    ALLOW IN    Anywhere (v6)
[ 5] 22/tcp (v6)                ALLOW IN    Anywhere (v6)
[ 6] 443 (v6)                   ALLOW IN    Anywhere (v6)
Then pick a firewall rule based on its number to delete, I picked number 3 and 6, because I want to delete https rule
sudo ufw delete 3
sudo ufw delete 6
UFW will print a confirmation prompt and you can continue deleting the firewall rules
/home/mypapit# ufw delete 6
Deleting:
 allow 443
Proceed with operation (y|n)? y
Rule deleted (v6)

/home/mypapit# ufw delete 3
Deleting:
 allow 443
Proceed with operation (y|n)? y
Rule deleted
Intermediate UFW: Deny access from ip address or ip block
You can prevent certain ip address or ip blocks / subnets from reaching your server by running:
sudo ufw deny from 172.18.44.12
Deny an ip address subnet
sudo ufw deny from 172.18.44.0/24
Deny an ip address subnet, example #2
sudo ufw deny from 172.16.0.0/16
Intermediate UFW: Allow services to be connected from certain ip address or subnet
In this case, I will only allow certain ip address to connect to my SSH port.
First we delete the old – “allow all” SSH rule
sudo ufw disable
sudo ufw delete allow ssh
Then we add ip address to be allowed to connect to SSH port
sudo ufw allow from 192.168.20.40 to any port ssh
Alternatively, you could also specify port number and protocol
sudo ufw allow from 192.168.20.40 to any port 22 proto tcp
Only allow SSH connections from certain subnets
sudo ufw allow from 192.168.20.0/24 to any port 22 proto tcp
Note: Adding firewall rules to only allow SSH connection from certain subnets would increase the server security, further reducing brute-force attack.


Here’s a simple guide on how to add the correct mime-type for Android APK file for Nginx webserver.
sudo nano /etc/nginx/mime.types
In “mime.types” file, add this line within the “types” block
types {
     ...
     ...
     application/vnd.android.package-archive     apk;
     ...
     ...
}
Restart nginx server
sudo service nginx restart
Done!
This post concerns on generating self-signed TLS/SSL certificate for Nginx in Ubuntu LTS and assumes that you’ve configured nginx server with a default site.
Step 1: Generate OpenSSL certificate
sudo mkdir /etc/nginx/ssl
sudo openssl req -x509 -nodes -days 365 -newkey rsa:2048 -keyout /etc/nginx/ssl/nginx.key -out /etc/nginx/ssl/nginx.crt
You are about to be asked to enter information that will be incorporated
into your certificate request.
What you are about to enter is what is called a Distinguished Name or a DN.
There are quite a few fields but you can leave some blank
For some fields there will be a default value,
If you enter '.', the field will be left blank.
-----
Country Name (2 letter code) [AU]:US
State or Province Name (full name) [Some-State]:CA
Locality Name (eg, city) []:Palo Alto
Organization Name (eg, company) [Internet Widgits Pty Ltd]:Mypapit LLC
Organizational Unit Name (eg, section) []:Billing
Common Name (e.g. server FQDN or YOUR name) []:Mypapit
Email Address []:mypapit+cert@gmail.com
Step 2: Edit nginx site config
You can edit nginx site config here, replace ‘default’ with your own server config.
sudo nano -c /etc/nginx/sites-enable/default
You will see this server block.
server {
        listen 80;
        listen [::]:80;
        server_name your_domain.com;
        root /var/www/your_domain.com;
        index index.html index.htm;

...
...
}
Add additional line (in italic)
server {
        listen 80;
        listen [::]:80;

    listen 443 ssl;

       server_name your_domain.com;
        root /var/www/your_domain.com;
      index index.html index.htm;

        ssl_certificate /etc/nginx/ssl/nginx.crt;
        ssl_certificate_key /etc/nginx/ssl/nginx.key;
        ssl_protocols TLSv1 TLSv1.1 TLSv1.2;
        ssl_prefer_server_ciphers on;
        add_header Strict-Transport-Security max-age=31536000;


...
...
}
Save file, and restart nginx server
sudo nginx -t
sudo service nginx restart
Test configuration by going to https://your_domain.com.
Done!
HSTS header
OwnCloud is a PHP-based Cloud-storage web application for remote storage with file synchronization capabilities.
Step 1
You need to install several packages in order to configure OwnCloud with nginx in your server
sudo apt-get -y install nginx-full php5-fpm php5-sqlite
Step 2: Download Owncloud
Download Owncloud, replace $OWNCLOUD_VER with the latest Owncloud version.
export OWNCLOUD_VER="8.1.0"
cd /var/www/
sudo wget -c https://download.owncloud.org/community/owncloud-${OWNCLOUD-VER}.tar.bz2
Step 3: Extract Owncloud
This will extract owncloud to /var/www/owncloud/
cd /var/www/
tar jxvf owncloud-${OWNCLOUD-VER}.tar.bz2
Step 4: Setup Nginx
You need to setup NGINX
cd /etc/nginx/sites-available
sudo nano -c /etc/nginx/sites-available/owncloud
Step 4a: Setup ‘owncloud’ nginx site
Please change server_name directive to your own ip address or your own domain.
You can also download textfile and upload it directly to your server: http://pastebin.com/2P8h1zNB
#
#/etc/nginx/sites-available/owncloud
#
server {
  listen 80;
server_name cloud.example.com;
server_name 192.168.1.47;

  # Path to the root of your owncloud installation
  root /var/www/owncloud/;
  # set max upload size
  client_max_body_size 10G;
  fastcgi_buffers 64 4K;

  # Disable gzip to avoid the removal of the ETag header
  gzip off;

  # Uncomment if your server is build with the ngx_pagespeed module
  # This module is currently not supported.
  #pagespeed off;

  rewrite ^/caldav(.*)$ /remote.php/caldav$1 redirect;
  rewrite ^/carddav(.*)$ /remote.php/carddav$1 redirect;
  rewrite ^/webdav(.*)$ /remote.php/webdav$1 redirect;

  index index.php;
  error_page 403 /core/templates/403.php;
  error_page 404 /core/templates/404.php;

  location = /robots.txt {
    allow all;
    log_not_found off;
    access_log off;
    }

  location ~ ^/(?:\.htaccess|data|config|db_structure\.xml|README){
    deny all;
    }

  location / {
   # The following 2 rules are only needed with webfinger
   rewrite ^/.well-known/host-meta /public.php?service=host-meta last;
   rewrite ^/.well-known/host-meta.json /public.php?service=host-meta-json last;

   rewrite ^/.well-known/carddav /remote.php/carddav/ redirect;
   rewrite ^/.well-known/caldav /remote.php/caldav/ redirect;

   rewrite ^(/core/doc/[^\/]+/)$ $1/index.html;

   try_files $uri $uri/ /index.php;
   }

   location ~ \.php(?:$|/) {
   fastcgi_split_path_info ^(.+\.php)(/.+)$;
   include fastcgi_params;
   fastcgi_param SCRIPT_FILENAME $document_root$fastcgi_script_name;
   fastcgi_param PATH_INFO $fastcgi_path_info;
	  fastcgi_pass unix:/var/run/php5-fpm.sock;
   }

   location ~* \.(?:jpg|jpeg|gif|bmp|ico|png|css|js|swf)$ {
       expires 30d;
       # Optional: Don't log access to assets
         access_log off;
   }

  }
Step 4b: Enable ‘owncloud’ settings
cd /etc/nginx/sites-enable/
sudo ln -sf ../sites-available/owncloud .
nginx -t
service nginx restart
service php5-fpm restart
Step 5: Finishing off Owncloud setup
cd /var/www/
mkdir /var/www/owncloud/data
chmod 0770 /var/www/owncloud/data
chmod 0770 /var/www/owncloud/lib/private/
sudo chown -R www-data.www-data /var/www/owncloud
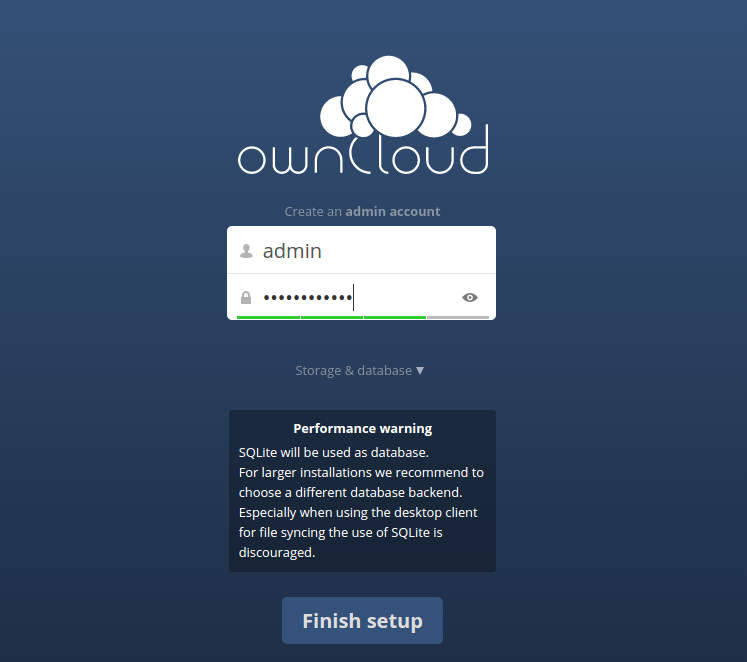
Step 6: Goto the IP-Address or domain name of your owncloud installation
First screen
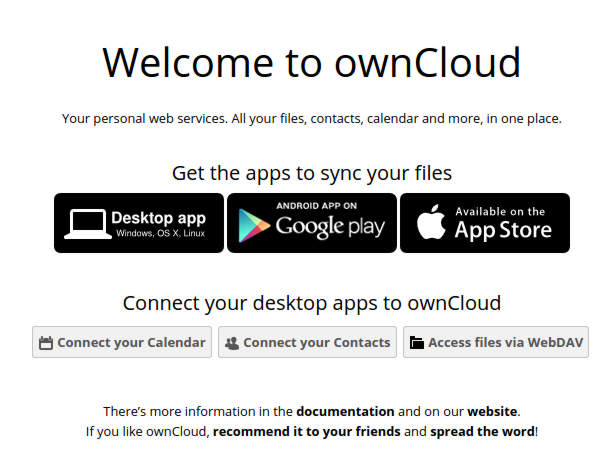
Welcome to Owncloud
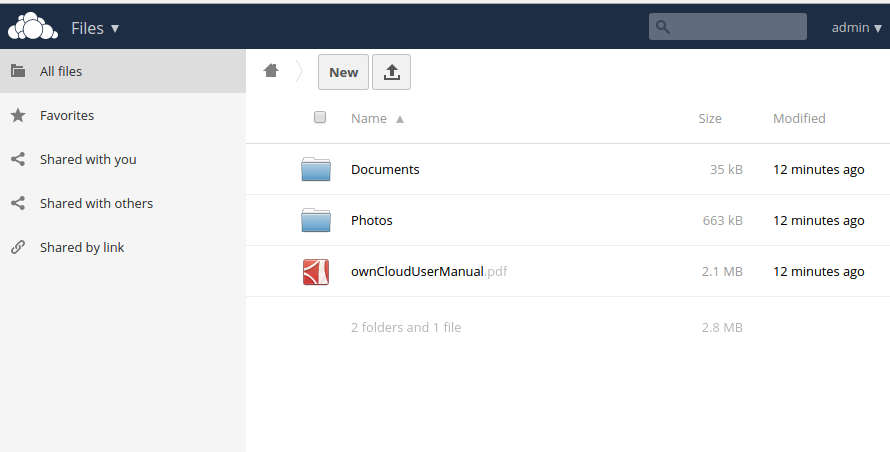
Owncloud File Manager and Settings
After completing installation you may:
OwnCloud servers does not support PageSpeed and SPDY module, so please disable those extension if its exists within your nginx configuration.
