Bash code for analyzing web server traffic to determine which ip accessed the web server the most

#!/bin/bash
# Check if a log file was specified
if [ "$#" -ne 1 ]; then
echo "Usage: $0 access.log"
exit 1
fi
LOG_FILE="$1"
if [ ! -f "$LOG_FILE" ]; then
echo "Error: Log file does not exist."
exit 1
fi
TOP_IPS=10
# Analyze the log file to find the top IP addresses
echo "Analyzing the log file to find the top $TOP_IPS IP addresses..."
awk '{print $1}' "$LOG_FILE" | sort | uniq -c | sort -nr | head -n "$TOP_IPS" | awk '{print "IP: " $2 ", Access Count: " $1}'

This handy script is useful for webserver traffic analysis task. It can be use to detect abusive IP address or spambots which accesses the webserver.

ystem administrators can utilize the generated list of IP addresses to enhance webserver security by blocking those IPs deemed potentially harmful or suspicious.

Configuration to run OJS 3 smoothly behind nginx reverse proxy

A lot of people struggling in configuring PKP Open Journal System 3 (OJS3) to run behind nginx reverse proxy as OJS3 does not support nginx natively

So most implementation would settle with Apache HTTPD server or install it behind nginx reverse proxy.

However the problem is that the OJS3 behave badly when placed behind nginx reverse proxy, especially when the reverse proxy is using HTTPS / TLS. This messed up the based URL in the OJS3, subsequently causing some resources from the website to be unavailable.

To solve this, you only need to add a single line in the Apache HTTPD site configuration file.

        SetEnvIf X-Forwarded-Proto "https" HTTPS=on

A full blown example is included via gist

# Mohammad Hafiz bin Ismail <mypapit@gmail.com>
# blog.mypapit.net
# this is for Ubuntu/Debian Apache server config
#/etc/apache2/sites-available/your-ojs.conf
<VirtualHost *:9080>
ServerAdmin ojs@example.com
ServerName ojs-site.example.com
ServerAlias ojs-site.com
DocumentRoot /mnt/websites/ojs/public_html
#add this line -- this is essential!!
SetEnvIf X-Forwarded-Proto "https" HTTPS=on
<Directory /mnt/websites/ojs/public_html/>
Options FollowSymlinks
AllowOverride All
Require all granted
Allow from all
</Directory>
</VirtualHost>

Check if your web server supports Brotli Compression

Brotli is a new compressed data format developed by Google for compressing web data. It is documented in RFC7932. Currently, almost all modern web browser support Brotli which compressed better and faster than Deflate.

Brotli is can be enabled in most popular web server including:

  • Apache HTTPD – through mod_brotli (for release after 2.4.26)
  • Nginx – ngx_brotli (provided by Google)
  • Node.js (trough shrink-ray module
  • LightSpeed (since version 5.2)
  • Microsoft IIS (through IIS-brotli extension, for IIS 7.5 and above)

Testing for Brotli Support

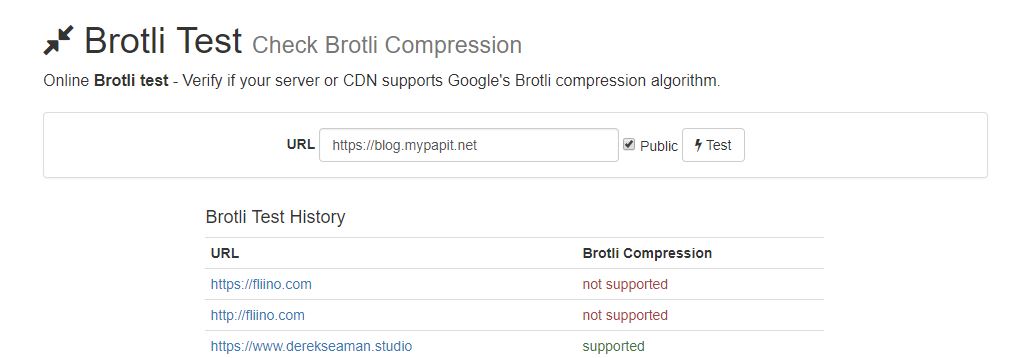
KeyCDN.com has provided a tool for testing whether your website supports Brotli compression.

You can go over the website and get your server tested. For nginx webserver, ngx_brotli will automatically downgrade to gzip if the browser does not support brotli encoding


How to analyze 404 HTTP code from weblogs

The dreaded 404 HTTP code means page not found. However multiple 403 and 404 on weblogs also can also mean there are attempts to crack the website.

The awk script down here can be useful tool to analyze weblogs and identify multiple attempts at cracking the web application.


awk '($9 ~ /404/)' access.log | awk '{print $7}' | sort | uniq -c | sort -n

The script can also be tweaked for other HTTP status code too.

Solving “Connection is encrypted using obsolete cipher suite” warning from Chrome

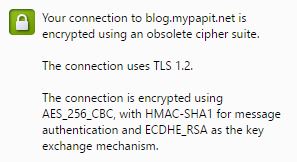
Here is a how to on how to solve the dreaded warning “Your connection is encrypted using obsolete cipher suit” from Google Chrome.

Firstly the warning had nothing to do with using cheap or self-signed TLS/SSL security certificate, but it has to do with cipher suite used on the server part.
obsolete-cipher-suite

So if you are a system administrator, you can edit the site config to include a more modern cipher.

NGINX Server

Using nginx, add the line containing “ssl_cipers” to the site config.

# /etc/nginx/sites-enable/example.conf 
server {
 listen 443 ssl;
 root /var/www/example.com/;
 server_name example.com;
   ssl_ciphers 'ECDHE-RSA-AES128-GCM-SHA256:ECDHE-ECDSA-AES128-GCM-SHA256:ECDHE-RSA-AES256-GCM-SHA384:ECDHE-ECDSA-AES256-GCM-SHA384:DHE-RSA-AES128-GCM-SHA256:DHE-DSS-AES128-GCM-SHA256:kEDH+AESGCM:ECDHE-RSA-AES128-SHA256:ECDHE-ECDSA-AES128-SHA256:ECDHE-RSA-AES128-SHA:ECDHE-ECDSA-AES128-SHA:ECDHE-RSA-AES256-SHA384:ECDHE-ECDSA-AES256-SHA384:ECDHE-RSA-AES256-SHA:ECDHE-ECDSA-AES256-SHA:DHE-RSA-AES128-SHA256:DHE-RSA-AES128-SHA:DHE-DSS-AES128-SHA256:DHE-RSA-AES256-SHA256:DHE-DSS-AES256-SHA:DHE-RSA-AES256-SHA';

        ssl_protocols TLSv1.1 TLSv1.2;
        ssl_prefer_server_ciphers on;
...
...
...

}

sudo service nginx restart

Apache HTTP Server

For those who are using Apache HTTP server, you can edit the VirtualHost file from “/etc/apache2/sites-enable/” directory.

<VirtualHost *:443>
    ...
    SSLEngine on
    SSLCertificateFile      /path/to/signed_certificate
    SSLCertificateChainFile /path/to/intermediate_certificate
    SSLCertificateKeyFile   /path/to/private/key
    SSLCACertificateFile    /path/to/all_ca_certs

    # Intermediate configuration, tweak to your needs
    SSLProtocol             all -SSLv2 -SSLv3
    SSLCipherSuite          ECDHE-RSA-AES128-GCM-SHA256:ECDHE-ECDSA-AES128-GCM-SHA256:ECDHE-RSA-AES256-GCM-SHA384:ECDHE-ECDSA-AES256-GCM-SHA384:DHE-RSA-AES128-GCM-SHA256:DHE-DSS-AES128-GCM-SHA256:kEDH+AESGCM:ECDHE-RSA-AES128-SHA256:ECDHE-ECDSA-AES128-SHA256:ECDHE-RSA-AES128-SHA:ECDHE-ECDSA-AES128-SHA:ECDHE-RSA-AES256-SHA384:ECDHE-ECDSA-AES256-SHA384:ECDHE-RSA-AES256-SHA:ECDHE-ECDSA-AES256-SHA:DHE-RSA-AES128-SHA256:DHE-RSA-AES128-SHA:DHE-DSS-AES128-SHA256:DHE-RSA-AES256-SHA256:DHE-DSS-AES256-SHA:DHE-RSA-AES256-SHA
    SSLHonorCipherOrder     on
    SSLCompression          off

    # OCSP Stapling, only in httpd 2.3.3 and later
    SSLUseStapling          on
    SSLStaplingResponderTimeout 5
    SSLStaplingReturnResponderErrors off
    # On Apache 2.4+, SSLStaplingCache must be set *outside* of the VirtualHost
    SSLStaplingCache        shmcb:/var/run/ocsp(128000)
 
    # Enable this if your want HSTS (recommended)
    # Header add Strict-Transport-Security "max-age=15768000"
 
    ...
</VirtualHost>

You can restart Apache HTTP server by running

sudo service apache2 restart

How to set Android *.apk mime-type for Nginx web server

Here’s a simple guide on how to add the correct mime-type for Android APK file for Nginx webserver.

sudo nano /etc/nginx/mime.types

In “mime.types” file, add this line within the “types” block

types {
     ...
     ...
     application/vnd.android.package-archive     apk;
     ...
     ...
}
     

Restart nginx server

sudo service nginx restart

Done!