UPDATE: You can now install NGINX with PageSpeed in Ubuntu LTS with deb package: https://blog.mypapit.net/2015/08/install-nginx-with-pagespeed-using-deb-for-ubuntu-lts-amd64.html
INSTALLING NGINX USING UBUNTU APT-GET SOURCE
PageSpeed modules are open source modules developed by Google Inc that can perform website optimization to ensure faster site delivery, automatically.
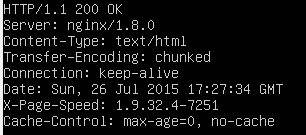
PageSpeed module is not included in NGINX installation in Ubuntu or Debian. So you need to recompile NGINX together with PageSpeed module, to enable its functionality.
You can install NGINX 1.8.0 with PageSpeed for Ubuntu 14.04 LTS here, using dpkg:
or you can compile it from source code using apt-get.
There are several steps to this method, first you need to get the latest nginx stable (or mainline) from PPA (optional)
#this step is optional, only if you want to get the latest Ubuntu version of nginx
sudo apt-get -y install software-properties-common
sudo -s
nginx=stable # use nginx=development for latest development version
add-apt-repository ppa:nginx/$nginx
apt-get update
apt-get -y upgrade
Then, you’ve to install dpkg-dev, unzip utility and nginx source from apt repository
apt-get -y install dpkg-dev unzip
apt-get install nginx
apt-get source nginx
After that, you need to download PageSpeed module, this instruction is adapted from
https://developers.google.com/speed/pagespeed/module/build_ngx_pagespeed_from_source
**note replace ${NGINX_VERSION} with the version of NGINX available from apt-get, in my case – its “1.8.0”
cd
export NPS_VERSION=1.9.32.4
export NGINX_VERSION=1.8.0
wget -c https://github.com/pagespeed/ngx_pagespeed/archive/release-${NPS_VERSION}-beta.zip
unzip release-${NPS_VERSION}-beta.zip
cd ngx_pagespeed-release-${NPS_VERSION}-beta/
wget -c https://dl.google.com/dl/page-speed/psol/${NPS_VERSION}.tar.gz
tar -xzvf ${NPS_VERSION}.tar.gz
cd nginx-${NGINX_VERSION}
Install all build dependencies (your configuration may varies, but i keep it within default Ubuntu configuration.
apt-get -y install libpcre3-dev libssl-dev libxslt1-dev libgd-dev libgeoip-dev geoip-bin geoip-database libpam0g-dev zlib1g-dev memcached
Then configure nginx, remember to replace ${NGINX_VERSION} with your current version of NGINX. In my case, its “1.8.0”
cd nginx-${NGINX_VERSION}
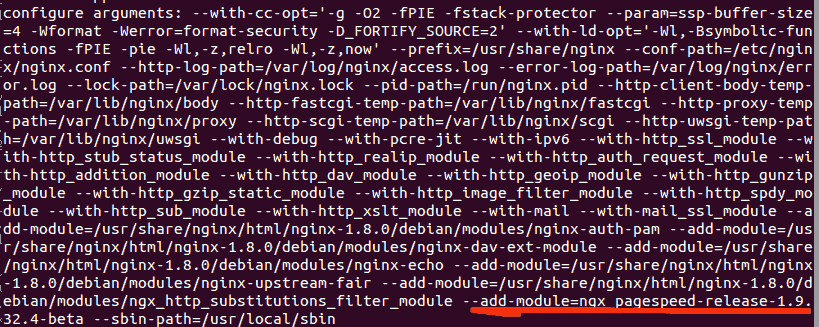
./configure --with-cc-opt='-g -O2 -fPIE -fstack-protector --param=ssp-buffer-size=4 -Wformat -Werror=format-security -D_FORTIFY_SOURCE=2' --with-ld-opt='-Wl,-Bsymbolic-functions -fPIE -pie -Wl,-z,relro -Wl,-z,now' --prefix=/usr/share/nginx --conf-path=/etc/nginx/nginx.conf --http-log-path=/var/log/nginx/access.log --error-log-path=/var/log/nginx/error.log --lock-path=/var/lock/nginx.lock --pid-path=/run/nginx.pid --http-client-body-temp-path=/var/lib/nginx/body --http-fastcgi-temp-path=/var/lib/nginx/fastcgi --http-proxy-temp-path=/var/lib/nginx/proxy --http-scgi-temp-path=/var/lib/nginx/scgi --http-uwsgi-temp-path=/var/lib/nginx/uwsgi --with-debug --with-pcre-jit --with-ipv6 --with-http_ssl_module --with-http_stub_status_module --with-http_realip_module --with-http_auth_request_module --with-http_addition_module --with-http_dav_module --with-http_geoip_module --with-http_gunzip_module --with-http_gzip_static_module --with-http_image_filter_module --with-http_spdy_module --with-http_sub_module --with-http_xslt_module --with-mail --with-mail_ssl_module --add-module=debian/modules/nginx-auth-pam --add-module=debian/modules/nginx-dav-ext-module --add-module=debian/modules/nginx-echo --add-module=debian/modules/nginx-upstream-fair --add-module=debian/modules/ngx_http_substitutions_filter_module --sbin-path=/usr/local/sbin --add-module=$HOME/ngx_pagespeed-release-${NPS_VERSION}-beta
After that, run make and make install
make
make install
The newly compiled nginx will be installed in “/usr/local/bin” without overwriting the original binary file.
Create nginx-pagespeed /etc/init.d file
Optionally you may duplicate nginx in init.d, and rename it to nginx-pagespeed, and stop the original nginx server
cp /etc/init.d/nginx /etc/init.d/nginx-pagespeed
sed -i 's|/usr/sbin/nginx|/usr/local/sbin/nginx|g' /etc/init.d/nginx-pagespeed
service nginx stop
You may also enable basic PageSpeed config in /etc/nginx/conf.d/
nano /etc/nginx/conf.d/pagespeed.conf
And add these basic PageSpeed config
#file /etc/nginx/conf.d/pagespeed.conf
        pagespeed on;
        pagespeed FetchWithGzip on;

        pagespeed FileCachePath /run/shm/pagespeed_cache;
        pagespeed RewriteLevel CoreFilters;
Save the file, and test nginx config, after that, start nginx-pagespeed service.
/usr/local/sbin/nginx -t

service nginx-pagespeed start
**Note: This instruction has been tested under Ubuntu 14.04 LTS with nginx 1.8.0 from ppa:nginx/stable respository. The LTS is chosen because it has much longer support for server, and nginx 1.8.0 supports both spdy 3.1 and latest PageSpeed.
***Please share any thoughts or opinion or suggested correction if this guide didn’t work for you. Thanks!!
Recommended Reading