Running a local AI system such as Ollama, Open WebUI, or a Retrieval-Augmented Generation (RAG) application often means preparing a collection of PDF files, Microsoft Word documents, and LibreOffice files. These formats are useful for everyday work, but they are not always easy to parse or index correctly.
MarkForge converts these files into Markdown, a simple text format suitable for local AI knowledge bases. In this guide, we will install the Punctiq version of MarkForge using Docker on Ubuntu Linux and convert documents without sending them to an external service.
What Is MarkForge?
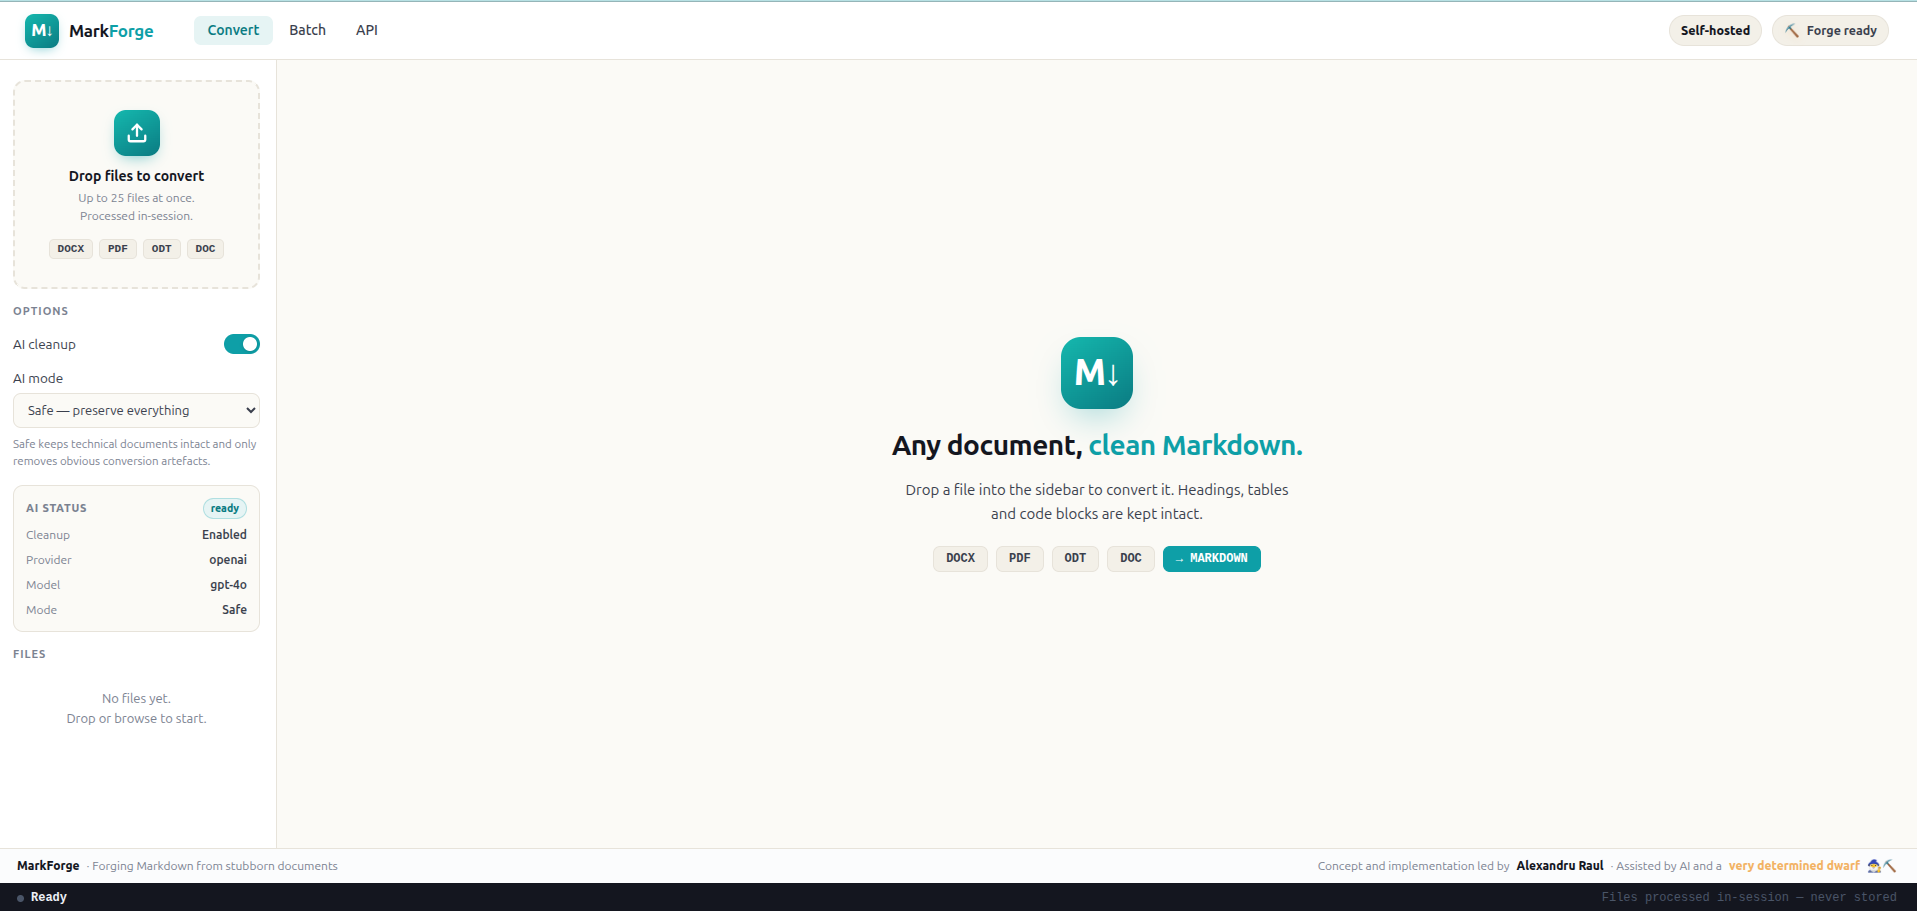
MarkForge is an open-source, self-hosted document converter. It supports batch processing, Markdown previews, extraction of figures, optional AI-assisted cleanup, and ZIP exports containing converted documents and associated files.
| Document type | Supported extension |
|---|---|
.pdf |
|
| Microsoft Word | .docx |
| Legacy Microsoft Word | .doc |
| OpenDocument Text | .odt |
Important: Several unrelated projects also use the MarkForge name. This article covers github.com/Punctiq/markforge. Its supported Office document formats do not include Excel, PowerPoint, or OpenDocument spreadsheet/presentation files.
Why Markdown for Local AI?
Markdown is plain text with lightweight structure. It can preserve headings, paragraphs, lists, simple tables, and image references without the additional formatting data found in Word files and PDFs.
For a local RAG system, Markdown content can be split into smaller sections, embedded, and stored in a vector database. Keeping the headings can also make the retrieved passages easier to understand. However, conversion is not a guarantee of accurate extraction. Tables, equations, and multi-column pages still need to be checked.
Step 1: Install MarkForge with Docker
We will use Docker on Ubuntu. The project’s Docker image includes dependencies such as LibreOffice and Pandoc.
Clone the source repository:
git clone https://github.com/Punctiq/markforge.git
cd markforge
Copy the example environment file:
cp .env.example .envEdit .env and check the following settings:
FLASK_ENV=production
AUTH_ENABLED=false

LLM_PROVIDER=openai
LLM_API_KEY=
LLM_BASE_URL=
With the API key left empty, MarkForge can perform normal document conversion without invoking an external AI model. Keep AUTH_ENABLED=false only if the application remains restricted to your own machine or another trusted environment.
Build and start the application:
docker compose up -d --buildOpen http://127.0.0.1:8010 in a browser on the Docker host. The provided Compose configuration binds port 8010 to the host’s loopback address, rather than exposing the service directly to the local network or internet.
Check whether the service is responding:
curl http://127.0.0.1:8010/api/v1/healthStep 2: Convert PDF, Word, and ODT Files
- Open the MarkForge web interface.
- Select a
.pdf,.docx,.doc, or.odtdocument. - Disable AI Cleanup for conversion without LLM calls.
- Start conversion and inspect the resulting Markdown preview.
- Download the Markdown or the ZIP package containing the output and figures.
The ZIP package is helpful when a document has figures that need to remain together with the Markdown file.
Automate a conversion with curl
MarkForge also provides a conversion API. For example, to convert manual.pdf into a ZIP package:
curl -f \
  -F "file=@manual.pdf" \
  -F "ai_cleanup=false" \
  -F "output_format=zip" \
  http://127.0.0.1:8010/api/v1/convert \
  -o manual.zip
This approach can be adapted to a local document-processing script. Check the API response and converted content before automatically indexing the output.
PDF limitation: This version uses PyMuPDF to extract existing text. Image-only scanned pages without selectable text are not automatically processed with OCR. Perform OCR separately before conversion if your PDF consists of scanned pages.
Step 3: Optional AI Cleanup with Ollama
MarkForge can optionally send extracted Markdown to an LLM for formatting cleanup. It supports OpenAI-compatible endpoints, including a locally hosted Ollama server.
For MarkForge installed directly on the same host as Ollama, a basic configuration is:
LLM_PROVIDER=ollama
LLM_MODEL=qwen3:4b
LLM_BASE_URL=http://127.0.0.1:11434/v1
LLM_API_KEY=ollama
Use a model that you actually have installed. Docker users must change the endpoint: inside the MarkForge container, 127.0.0.1 refers to the container itself, not the machine running Ollama. Configure a reachable host or Docker network address before enabling cleanup.
Safe, Balanced, and Aggressive cleanup modes are available. For technical, academic, and compliance-related documents, begin with Safe mode and compare the output against the original document. An LLM may alter terminology, numbers, or meaning while attempting to improve formatting.
Step 4: Import Markdown into a Local AI Knowledge Base
After conversion, place the Markdown files and extracted figures inside a local folder:
knowledgebase/
??? student-regulations.md
??? research-guidelines.md
??? server-documentation.md
??? figures/
    ??? diagram-01.png
    ??? diagram-02.png
You can then import the documents into an Open WebUI knowledge collection or process them in a custom RAG pipeline. For lengthy material, splitting content by section headings often makes chunks more useful than splitting at arbitrary positions.
Before indexing, check headings, reading order, tables, equations, citations, and references to images. Keep a copy of the source file for future verification.
Why Privacy Matters When Converting Documents
Many websites offer free PDF-to-Markdown and Word-to-Markdown conversion. While convenient, uploading files to a service you do not control may expose confidential information.
This is particularly important for documents containing student records, unpublished academic manuscripts, internal technical specifications, contracts, financial details, or other personal information.
When using a third-party service, you may not have full visibility into document retention, server logging, subcontractors, or how uploaded data is processed. Privacy claims should be checked against the provider’s actual terms and technical practices.
Self-hosting reduces unnecessary exposure by keeping processing on infrastructure under your control. It does not automatically guarantee privacy. If you enable a remote LLM provider for AI cleanup, extracted document content may still leave your network.
For sensitive documents, keep conversion local, disable cloud cleanup, restrict access to the MarkForge server, and secure temporary files and converted outputs. Never expose an unauthenticated document converter directly to the public internet.
Final Thoughts
MarkForge provides a straightforward way to convert PDF, Word, and OpenDocument Text files into Markdown for Ollama, Open WebUI, and other local AI workflows. Its self-hosted installation is useful when the documents should remain on your own computer or trusted server.
For a private RAG knowledge base, the recommended workflow is simple: convert locally, inspect the Markdown, and then index only the verified content.
Project: Punctiq MarkForge on GitHub
License: Apache License 2.0