PolicyMaker: A Lightweight PHP Tool to Create Privacy Policy Pages for Android Apps

PolicyMaker is a lightweight web application for creating, managing, publishing, and displaying privacy policies for Android mobile applications. It is built using PHP and SQLite, so it does not need a heavy database server or complex deployment setup. The project is available on GitHub – https://github.com/mypapit/policymaker

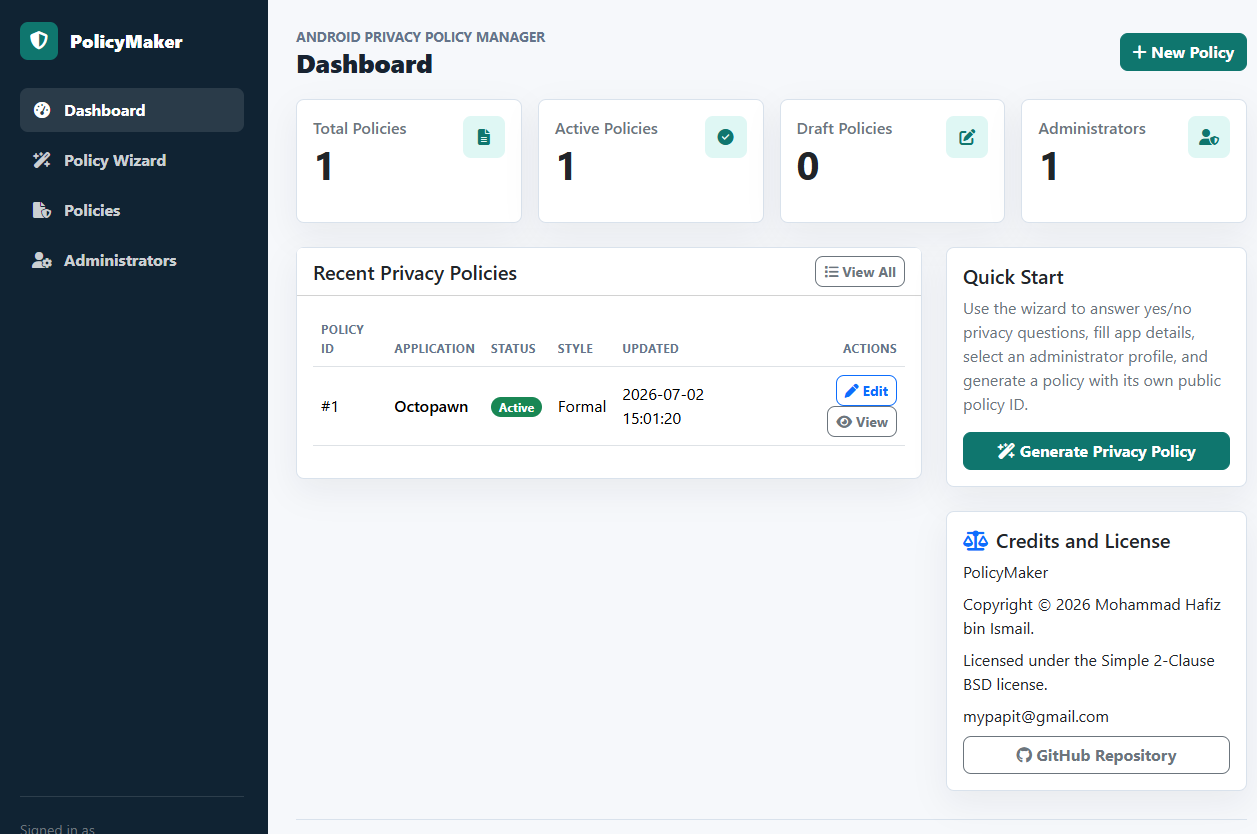
PolicyMaker Dashboard
PolicyMaker Wizard
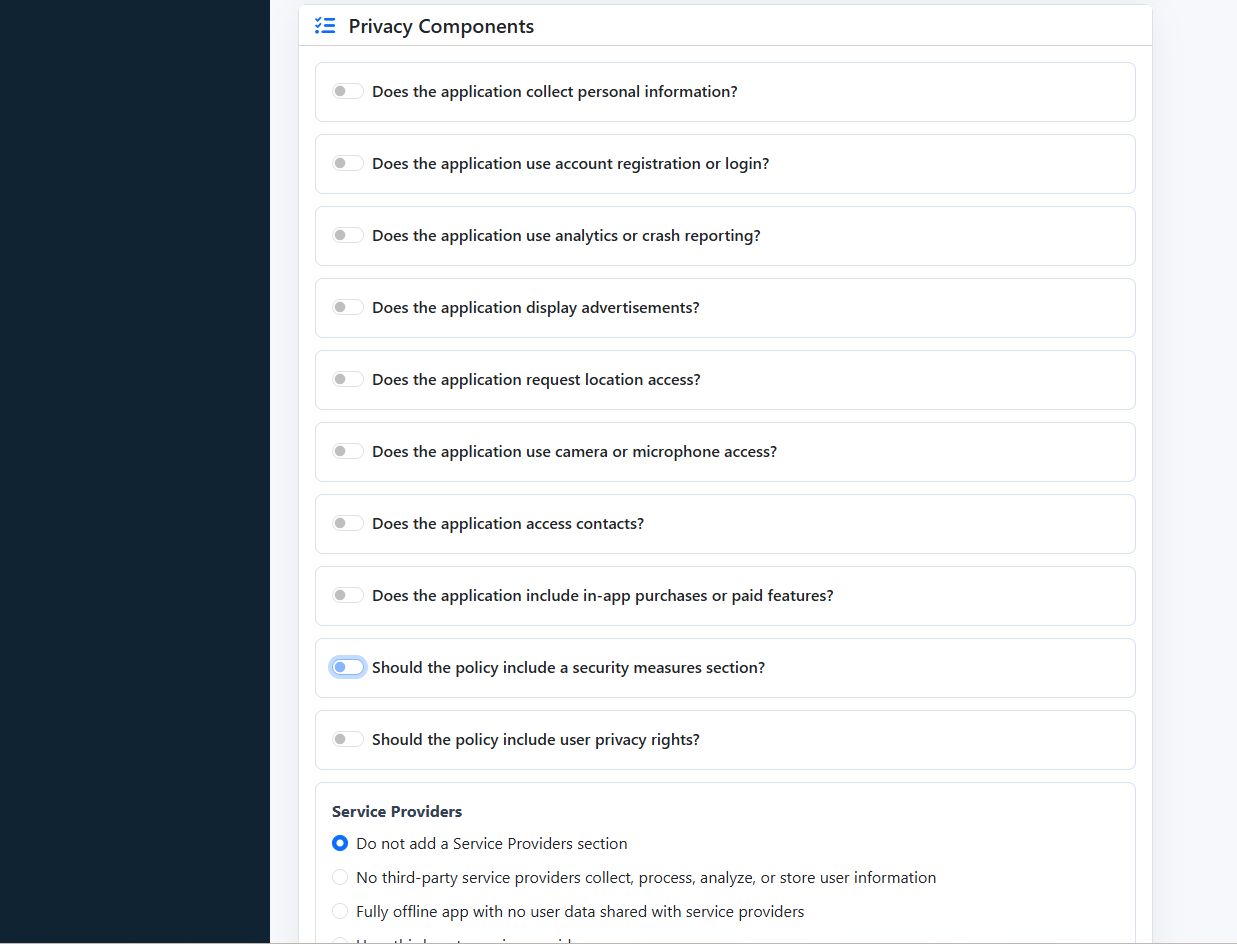
The main idea behind PolicyMaker is simple. Many Android developers need a public privacy policy page, especially when publishing applications to app stores. Instead of manually writing and formatting the same policy structure again and again, PolicyMaker provides an administrator-only wizard that helps generate structured privacy policy text from simple inputs.

The wizard supports yes/no choices, radio buttons, checkboxes, and text fields. It can collect details such as application name, package name, website, effective date, personal data collection, analytics, advertising, permissions, service providers, data retention, security, user rights, and children’s privacy.

PolicyMaker is useful for small developers, indie Android publishers, educators, and small organizations that manage several simple mobile apps. It is not meant to be a large enterprise compliance platform. Its strength is that it is small, direct, and easy to host. It only requires PHP 8.3 or newer with SQLite/PDO SQLite support. The installer creates the SQLite database and generates the first administrator password.

The public policy pages also include Schema.org JSON-LD metadata, which helps make the policy page more structured for search engines

PolicyMaker is licensed under the BSD 2-Clause license. This makes it practical for developers who want a small self-hosted privacy policy system that can be modified and deployed with minimal restriction.

This blog now runs on PHP 7!

Hi all,

I’m proud to announce to all the after several tinkering, this blog now runs on PHP 7 ! PHP 7 is the latest iteration of the popular general-purpose scripting language that is suited to web development.

PHP7 is touted to perform up to TWO TIMES faster than PHP5.

Here are the performance benchmark run by Kinsta has shown that PHP7 has significantly improved performance when compared to PHP 5.6.


  • WordPress 4.3.1 HHVM RepoAuthoritative benchmark result: 375.48 trans/sec
  • WordPress 4.3.1 HHVM benchmark result: 357.69 trans/sec
  • WordPress 4.3.1 PHP 7.0 benchmark result: 306.24 trans/sec
  • WordPress 4.3.1 PHP 5.6.16 benchmark result: 106.45 trans/sec

* Retrieved from Kinsta: The Definitive PHP 7.0 & HHVM Benchmark

Next I’ll update you with the guide on howto run and execute PHP7 and PHP5 side-by-side to cater for multiple websites.

Stay tuned, and expect more posts and updates from this venerable blog anyday now :p

Easyrec – Integrate Recommender Engine in your website – open source

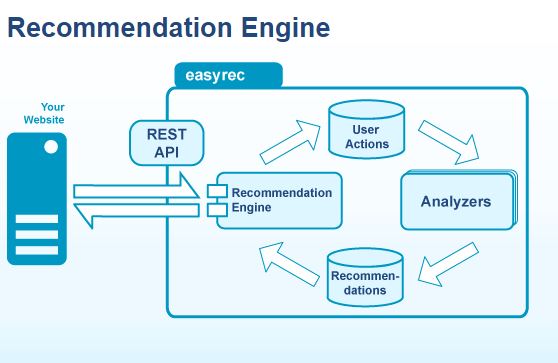
Easyrec is an open source recommender engine which can be trained and customized to provide personalized recommendations using REStful Web Service.

easyrec-engine
Easyrec exposes its functionality through REST API which provides several interaction types:

Actions

  1. view
  2. buy
  3. sendaction

Recommedations

  1. other users also viewed
  2. other users also bought
  3. items rated good by other users
  4. recommendations for user
  5. related items
  6. action history for user

Community Rankings

  1. most viewed items
  2. most bought items
  3. most rated items
  4. best rated items
  5. worst rated items

The list of recommendations is returned in XML and JSON notation to be further processed by your web application.

Easyrec API can be accessed from its main website http://easyrec.org/ or could be installed alongside with the web application on your own server. Easyrec require at least Java 1.5 and MySQL server for its functionality.

Download easyrect from: http://easyrec.org/recommendation-engine

How to Optimize and speed up PHP with OPCache

PHP 5.5 and 5.6 comes with OPCache. OPCache speeds up PHP execution by storing precompile bytecode of PHP in shared memory. Taking advantage of fast memory operations compared to hard disk operation, OPCache eliminates the process of having to read PHP scripts from the disk each time whenever a script must be executed.

In short, OPCache saves the time needed to serve PHP-powered websites!

How to enable OPCache?
This tutorial is written from Ubuntu 14.04 LTS standpoint – using php5-fpm, but it should also work for other Linux distro.

  1. First edit ‘/etc/php5/fpm/php.ini‘ file.
  2. Find “opcache” section in the PHP ini.
  3. Uncomment and change opcache.enable to opcache.enable=1
  4. Do the same for >opcache.memory_consumption, changed its value from 64 to 128 (or 256)
  5. Change opcache.interned_strings_buffer from 4 to 16
  6. Changed the opcache.max_accelerated_files to 8192

Activate OPCache with php5enmod command.

sudo php5enmod opcache

Save file and restart php5-fpm.

sudo service php5-fpm restart

PHP OPCache should be running on your server now. Here’s a reference of /etc/php/fpm/php.ini file in Ubuntu 14.04 LTS.

[opcache]
; Determines if Zend OPCache is enabled
opcache.enable=1

; Determines if Zend OPCache is enabled for the CLI version of PHP
opcache.enable_cli=0

; The OPcache shared memory storage size.
opcache.memory_consumption=128

; The amount of memory for interned strings in Mbytes.
opcache.interned_strings_buffer=16

; The maximum number of keys (scripts) in the OPcache hash table.
; Only numbers between 200 and 100000 are allowed.
opcache.max_accelerated_files=8192

BONUS: How to verify whether PHP OPCache is running ??
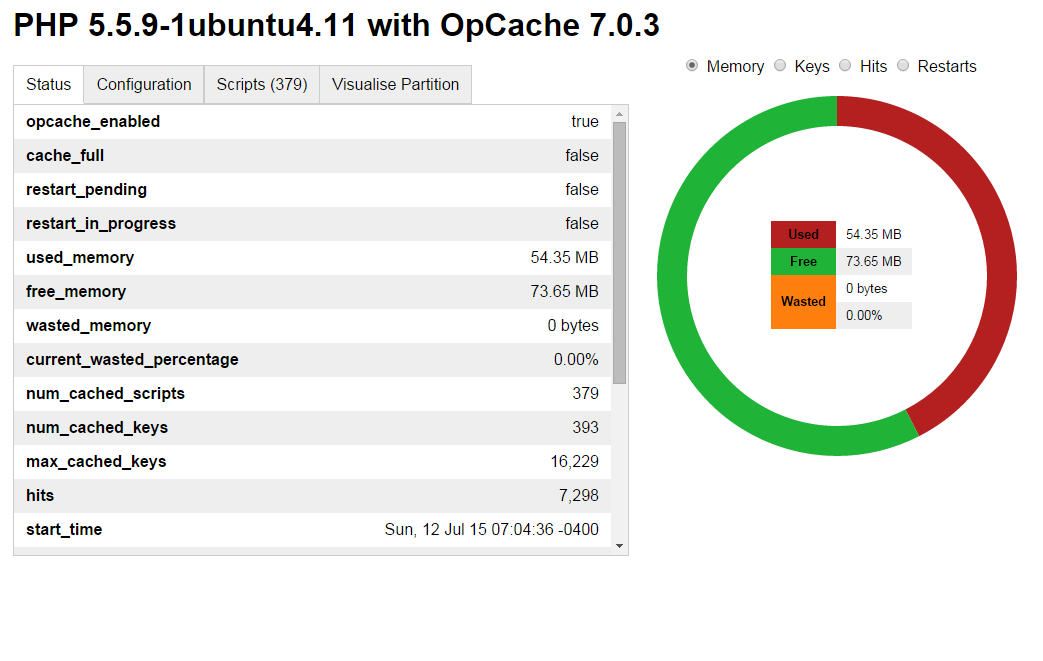
You can verify whether OPCache is running by using opcache-status by Rasmus Lerdorf. Just drop the script in one of your web directory and browse. If you’re not a Git fan, I’ve also have taken the liberty of mirroring the download: opcache-status.zip

opcache-status screenshot
opcache-status-ss

How to convert between sqlite2 and sqlite3 database

Here’s a short guide on how to convert between sqlite2 to sqlite3 database file:

sqlite2 /path/to/mysqlite2.db .dump > backupfile
sqlite3 /path/to/mynewsqlite3.db < backupfile

Using the same method, you can convert sqlite3 db to sqlite2 db too!

p/s: Why you need to convert? because embedded device (read: iPhone and Android) only supports sqlite3 database, while PHP 5 by default supports sqlite2 database.

Thus, this method provide a convenient way to convert between the two different version of sqlite db format.

Recommended Reading