How to analyze 404 HTTP code from weblogs

The dreaded 404 HTTP code means page not found. However multiple 403 and 404 on weblogs also can also mean there are attempts to crack the website.

The awk script down here can be useful tool to analyze weblogs and identify multiple attempts at cracking the web application.


awk '($9 ~ /404/)' access.log | awk '{print $7}' | sort | uniq -c | sort -n

The script can also be tweaked for other HTTP status code too.

Howto install OwnCloud with NGINX in Ubuntu LTS

OwnCloud is a PHP-based Cloud-storage web application for remote storage with file synchronization capabilities.

Step 1
You need to install several packages in order to configure OwnCloud with nginx in your server

sudo apt-get -y install nginx-full php5-fpm php5-sqlite

Step 2: Download Owncloud
Download Owncloud, replace $OWNCLOUD_VER with the latest Owncloud version.

export OWNCLOUD_VER="8.1.0"
cd /var/www/
sudo wget -c https://download.owncloud.org/community/owncloud-${OWNCLOUD-VER}.tar.bz2

Step 3: Extract Owncloud
This will extract owncloud to /var/www/owncloud/

cd /var/www/
tar jxvf owncloud-${OWNCLOUD-VER}.tar.bz2

Step 4: Setup Nginx
You need to setup NGINX

cd /etc/nginx/sites-available
sudo nano -c /etc/nginx/sites-available/owncloud

Step 4a: Setup ‘owncloud’ nginx site

Please change server_name directive to your own ip address or your own domain.
You can also download textfile and upload it directly to your server: http://pastebin.com/2P8h1zNB

#
#/etc/nginx/sites-available/owncloud
# 
server {
  listen 80;
server_name cloud.example.com;
server_name 192.168.1.47;

  # Path to the root of your owncloud installation
  root /var/www/owncloud/;
  # set max upload size
  client_max_body_size 10G;
  fastcgi_buffers 64 4K;

  # Disable gzip to avoid the removal of the ETag header
  gzip off;

  # Uncomment if your server is build with the ngx_pagespeed module
  # This module is currently not supported.
  #pagespeed off;

  rewrite ^/caldav(.*)$ /remote.php/caldav$1 redirect;
  rewrite ^/carddav(.*)$ /remote.php/carddav$1 redirect;
  rewrite ^/webdav(.*)$ /remote.php/webdav$1 redirect;

  index index.php;
  error_page 403 /core/templates/403.php;
  error_page 404 /core/templates/404.php;

  location = /robots.txt {
    allow all;
    log_not_found off;
    access_log off;
    }

  location ~ ^/(?:\.htaccess|data|config|db_structure\.xml|README){
    deny all;
    }

  location / {
   # The following 2 rules are only needed with webfinger
   rewrite ^/.well-known/host-meta /public.php?service=host-meta last;
   rewrite ^/.well-known/host-meta.json /public.php?service=host-meta-json last;

   rewrite ^/.well-known/carddav /remote.php/carddav/ redirect;
   rewrite ^/.well-known/caldav /remote.php/caldav/ redirect;

   rewrite ^(/core/doc/[^\/]+/)$ $1/index.html;

   try_files $uri $uri/ /index.php;
   }

   location ~ \.php(?:$|/) {
   fastcgi_split_path_info ^(.+\.php)(/.+)$;
   include fastcgi_params;
   fastcgi_param SCRIPT_FILENAME $document_root$fastcgi_script_name;
   fastcgi_param PATH_INFO $fastcgi_path_info;
	  fastcgi_pass unix:/var/run/php5-fpm.sock;
   }

   location ~* \.(?:jpg|jpeg|gif|bmp|ico|png|css|js|swf)$ {
       expires 30d;
       # Optional: Don't log access to assets
         access_log off;
   }

  }

Step 4b: Enable ‘owncloud’ settings

cd /etc/nginx/sites-enable/
sudo ln -sf ../sites-available/owncloud .
nginx -t
service nginx restart
service php5-fpm restart

Step 5: Finishing off Owncloud setup

cd /var/www/
mkdir /var/www/owncloud/data
chmod 0770 /var/www/owncloud/data
chmod 0770 /var/www/owncloud/lib/private/
sudo chown -R www-data.www-data /var/www/owncloud

Step 6: Goto the IP-Address or domain name of your owncloud installation

First screen
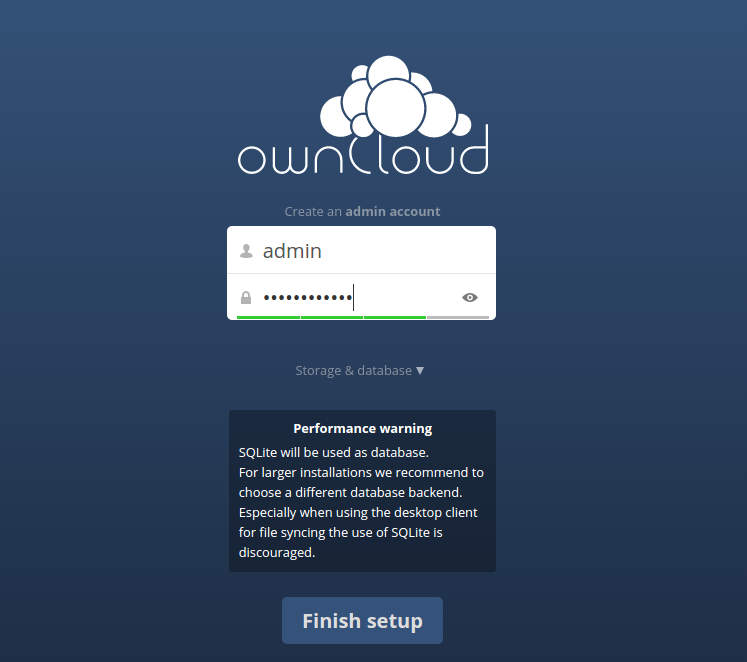
setup-owncloud-first

Welcome to Owncloud
welcome-to-owncloud

Owncloud File Manager and Settings
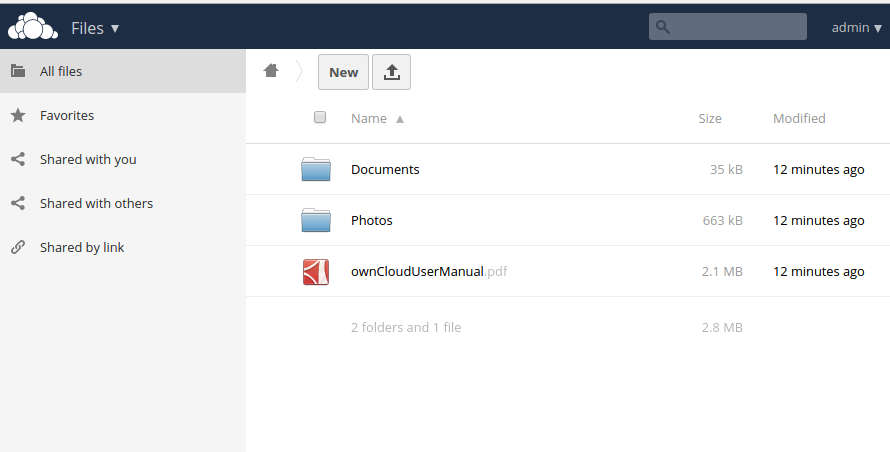
owncloud-filemanager

What’s Next?

After completing installation you may:

  1. Install Android, iPhone or Desktop client to sync all your files
  2. Install TLS/SSL Certificates to secure your Owncloud connection
  3. Install MariaDB/MySQL for efficient synchronization

Warning: Do not enable Pagespeed and SPDY in OwnCloud

OwnCloud servers does not support PageSpeed and SPDY module, so please disable those extension if its exists within your nginx configuration.

Recommended Owncloud book

How to limit MySQL port access to specific network

MySQL service port are not meant to be accessible to the outside world as it would become a security concern to the administrator.

Although MySQL server (mysqld) by itself has a built-in mechanism to deny access from unauthorized ip-address, it still does not protect it from being overwhelmed by multiple malicious requests or buffer overflow attack directed to the server.

One of the solution is to limit the MySQL port access to trusted network using iptables

This assume your trusted network has the address within the range of 192.168.1.1-192.168.1.254


iptables -A INPUT -i eth0 -p tcp -s 192.168.1.0/24 --dport 3306 -m state --state NEW,ESTABLISHED -j ACCEPT
iptables -A OUTPUT -o eth0 -p tcp --sport 3306 -m state --state ESTABLISHED -j ACCEPT

MySQL server (mysqld) uses port 3306.

Note: Always assume the internet as the untrusted network!

How to setup Secure Webserver HTTPS (SSL) on Apache in Ubuntu

Secure HTTP (SSL/TLS) has become a must if you are planning to setup a website which includes user authentication (ie. login box) or sensitive data. HTTPS prevents the sensitive data from being transfered across the network in clear text where it is susceptible to being sniffed or altered. Here is the tutorial on how to setup a secure HTTP on Apache web server in Ubuntu 10.04 (Lucid Lynx).

What do you need?

  • apache2 (Web Server)
  • openssl
  • A bit patient, because it will take some time to learn

Step 1: Create a self-signed certificate
You need to create a self-signed certificate with openssl. To do that you will need to generate the server key.


openssl genrsa -des3 -out server-sec.key 4096

…and certificate signing request (CSR)


openssl req -new -key server-sec.key -out server.csr

After that, generate the server certificate by signing it with the server key.

openssl x509 -req -days 365 -in server.csr -signkey server-sec.key -out server.crt

Keep the server-sec.key in a secure location, with read/write permission assigned only to root. Then generate a password-less copy of the key for Apache use.

openssl rsa -in server-sec.key -out server.key

By this time, you should have :

  • server.key (passwordless key for Apache)
  • server.csr (certificate signing request)
  • server.crt (certificate)
  • server-sec.key (server key)

Continue reading “How to setup Secure Webserver HTTPS (SSL) on Apache in Ubuntu”

How to find cause of heavy usage on your Apache webserver

Here’s a quick and dirty tips on how to find cause of heavy CPU resources usage on your Apache webserver (especially when running php scripts).

First you need to locate the Apache 2 “access.log” file. By default in Ubuntu, this file is located in “/var/logs/apache2” directory.

Then you need to run this command to find out which IP address accesses your website the most in a short time.
[code]
tail -10000 access.log| awk ‘{print $1}’ | sort | uniq -c |sort -n
[/code]

The output of the command should contain a list of IP addresses along with the number of hits it made in the last 10,000 access of your website
[code]
47 117.58.252.98
81 202.124.242.186
84 202.124.245.26
182 194.164.101.217
220 208.101.22.146
225 72.167.131.144
3946 93.135.xxx.xxx
[/code]

From here you can easily locate the offending ip address and proceed to block it from accessing your website further using .htaccess file or other blocking method.

Here is an example to block certain ip address from accessing your website using .htaccess file
[code] order deny,allow
deny from 93.135.xxx.xxx
[/code]

Save .htaccess file in the root directory of your web server (example /var/www), and the ip address wont be available to access your site again.

Hope that would help you!