If you are adventurous, you can refer to wutzebaer/tensorflow-5090 for a guide on how to build Python Pip Wheel for RTX50 accelerated Tensorflow.
Install Tensorflow with RTX 50 series GPU acceleration with Python wheel for Ubuntu 24.04 (and Windows WSL2)
It seems that the Tensorflow acceleration is broken with the latest RTX50 series GPU, especially with the most cost effective RTX5060Ti 16GB card.
This is a guide to install Tensorflow with RTX50 (Blackwell) card GPU acceleration with the python wheel.
First you need to download this python wheel. It is compiled for Ubuntu 24.04 or WSL2 with Ubuntu 24.04.
https://github.com/mypapit/tensorflowRTX50/releases
Then you may need to create a python virtual environment for the wheel.
sudo apt install python3-pip
sudo apt install python3-venv

# replace tensorflow220 with your preferred env name
python3 -m venv tensorflow220
Then you need to activate the environment.
source tensorflow220/bin/activateThen you may install the tensorflow wheel. To make it easier, you can also install it alongside other requirements.
pip install tensorflow-2.20.0dev0+selfbuild-cp312-cp312-linux_x86_64.whl seaborn pandas matplotlib opencv-python pillow imutils pydot graphviz librosaThen, you must install CUDA 12.8.1 and CUDNN 9.8.0, please refer to these links:
- https://developer.nvidia.com/cuda-12-8-1-download-archive
- https://developer.nvidia.com/cudnn-9-8-0-download-archive?target_os=Linux&target_arch=x86_64
Follow the instructions on the NVIDIA websites to install both cuda-12.8.1 and CUDNN 9.8.0
Install Nvidia Linux Driver (not required for WSL2)
Then you must install the latest NVIDIA Linux driver.
At the time of the writing, the latest driver is 570.169 (June 17, 2025)
The NVIDIA Linux driver is not required for Ubuntu 24.04 under WSL2. For that, you need to install Microsoft Windows NVIDIA driver available from NVIDIA App.
About the python wheel file:
The python wheel file is compiled in Ubuntu 24.04 with llvm and CUDA Toolkit 12.8.1. It supports compute_86, compute_89 and compute_120 cuda devices, which correspond to NVIDIA GPU card with Turing, Ada and Blackwell architectures (or in layman terms: RTX 30, RTX 40 and RTX 50) series.
The python wheel file also comes with AVX, AVX2 and FMA support for both Intel and AMD cpu acceleration.
The Tensorflow version installed is the Tensorflow 2.20dev edition, nightly from :
https://github.com/tensorflow/tensorflow
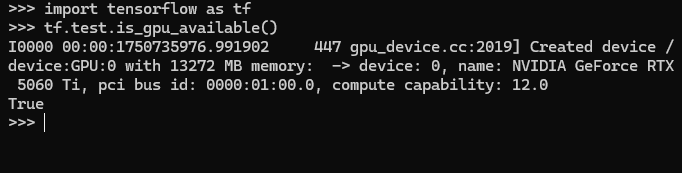
Finally you can test the Tensorflow binaries with the following command.
How to get Tensorflow acceleration with NVIDIA RTX 50 series GPU with docker ( RTX5060Ti 16GB) for Ubuntu and Windows WSL2
It seems that the Tensorflow acceleration is broken with the latest RTX50 series GPU, especially with the most cost effective RTX5060Ti 16GB card.
This is a how to guide to re-enable the Tensorflow acceleration with the official Tensorflow docker image from NVIDIA
Basically you need to install these four things:
- Docker (if you haven’t installed already)
- NVIDIA GPU drivers for Linux (only for Ubuntu)
- NVIDIA Container Toolkit
- NVIDIA Tensorflow Docker containers
Docker
apt -y install dockerInstalling NVIDIA GPU Driver
After downloading the NVIDIA GPU drivers for Linux (only for fully Linux-based operating system). This step is unnecessary for Microsoft Windows WSL2
bash NVIDIA_Linux_x86_64 570.153.02.run
Installing NVIDIA Container Toolkit
Follow the instruction here: https://docs.nvidia.com/datacenter/cloud-native/container-toolkit/latest/install-guide.html
Do not forget to configure docker
sudo nvidia-ctk runtime configure --runtime=docker
Then restart docker to enable gpu driver integration
sudo systemctl restart docker
Test the nvidia driver under the container runtime
sudo docker run --rm --runtime=nvidia --gpus all ubuntu nvidia-smi
Install NVIDIA Tensorflow docker containers (basic)
docker run --gpus all -it --rm nvcr.io/nvidia/tensorflow:xx.xx-tfx-py3
Replace the xx with the actualy version of the tensorflow containers, at the time of the writing it is:
docker run --gpus all -it --rm nvcr.io/nvidia/tensorflow:25.02-tf2-py3
If you want to run it inside the docker, and link your /home directory with the /workspace directory inside the docker image, you can just run :
docker run --gpus all -it --rm -v /home/username:/workspace nvcr.io/nvidia/tensorflow:25.02-tf2-py3
BONUS: How to install Spyder, Jupyterlab and additional Tensorflow/Keras libraries in NVIDIA docker image
I’ve prepared a Dockerfile to rebuild the NVIDIA Tensorflow docker container with GPU acceleration. Download the dockerfile and run “docker build” with this parameter
docker build -t my-nvidia-tf-ds .
Then you can run the container with GPU acceleration
docker run --gpus all -it --rm -v /root:/workspace my-nvidia-tf-ds
You can also expose the port and run Jupyterlab within the docker image. Just follow this step:
docker run --gpus all -p 8888:8888 -it my-nvidia-tf-ds \
jupyter lab --ip=0.0.0.0 --allow-root
Additionally, you can run Spyder in the docker image by forwarding xhost :
xhost +local:docker

docker run -it --gpus all -e DISPLAY=$DISPLAY -v /tmp/.X11-unix:/tmp/.X11-unix \
-v /root:/workspace my-nvidia-tf-ds

spyder
Hopefully this would help you run GPU accelerated Tensorflow with RTX50 series GPU card.
This also works under Microsoft Windows 11 / WSL2 environment too!
If you want to install Tensorflow with RTX 50 series support directly inside your Ubuntu environment, then refer to this post:
How to install cockpit dashboard on older Raspberry Pi 3, running Bookworm
Cockpit dashboard is a convenient dashboard for home user or enthusiasts for monitoring several SOHO servers. It supports multiple Linux based operating system, however there are some caveats in installing in Raspberry Pi 3 as it runs on older Bookworm based operating system.
first your need to add bookworm-backports.
echo "deb http://deb.debian.org/debian ${VERSION_CODENAME}-backports main" | sudo tee /etc/apt/sources.list.d/backports.listThen you need to configure the keyring
curl -O http://http.us.debian.org/debian/pool/main/d/debian-archive-keyring/debian-archive-keyring_2023.4_all.deb
sudo dpkg -i debian-archive-keyring_2023.4_all.deb Afterwards, you need to run this combo command to update software packages list
apt update && apt -y upgradeThen finally you install cockpit via bookworm-backports
apt install -t bookworm-backports cockpitAfter everything is done, you may check cockpit dashboard by going to:
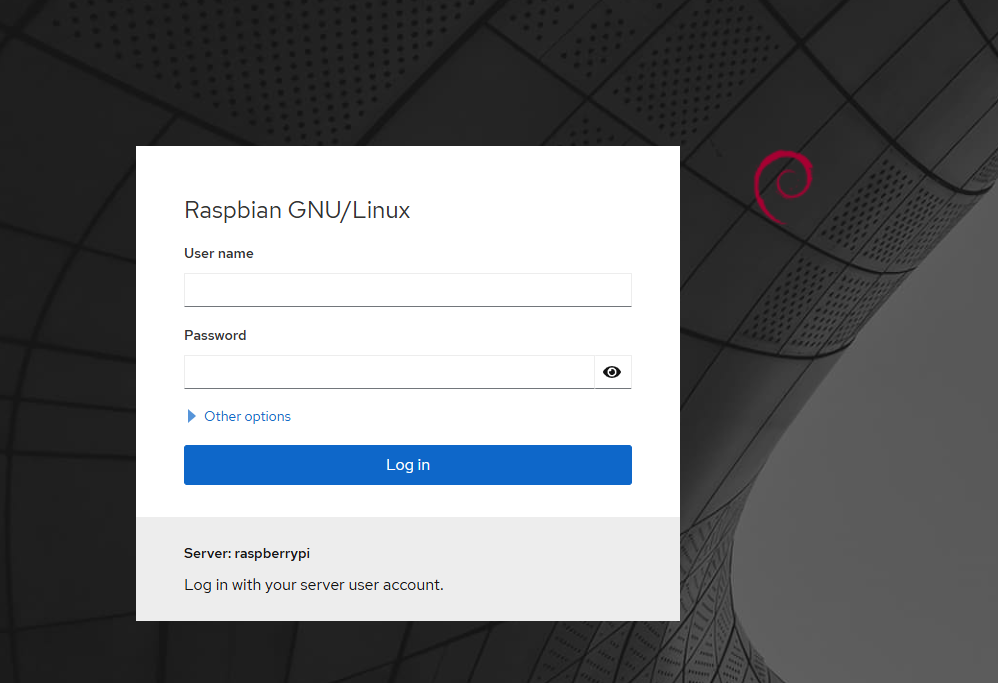
http://<ip address>:9090. and log in using your system username and password.
Command line to test disk speed in Linux
You can use this code to test out the disk speed of your Linux system
dd if=/dev/zero of=/tmp/output conv=fdatasync bs=384k count=1k; rm -f /tmp/output
credit: https://github.com/ethereum/go-ethereum/issues/26174
OVHCloud VPS Hosting : USD0.97/mo for 20GB SSD and 2GB RAM
Grab this opportunity.
OVHCloud is offering VPS Hosting for USD 0.97/mo for this VPS spec:
20GB SSD Storage
2GB RAM
1vCore
100Mbps unmetered
This VPS / KVM option is available in several datacenters :
- Singapore
- Australia
- North America /Canada
- Western Europe / France
- Central Europe / Germany
- Western Europe / UK

Get the OVHcloud USD 0.97/mo offer here before it expired!