Critical PHP Flaws: How to Update PHP 8.3, 8.4 and 8.5

Updated 22 October 2026. Commands below target Ubuntu/Debian package installations.

PHP has released emergency fixes for CVE-2026-109618 and CVE-2026-109619, both rated critical at CVSS 9.2. They can allow unauthenticated remote code execution. One involves unsafe out-of-memory cleanup; the other involves stale internal state across requests. Apache mod_php has a demonstrated attack before application code runs. PHP-FPM also requires patching. See the official announcement.

1. Check and update PHP

Back up your database, application files and configuration. Identify every runtime:

php -v
php --ini
dpkg -l 'php*' 'libapache2-mod-php*'

The CLI version may differ from the website. Check each virtual host, FPM pool, container and hosting panel.

Branch First fixed upstream version
PHP 8.3 8.3.36
PHP 8.4 8.4.27
PHP 8.5 8.5.12

Install these or later supported security releases. For PHP 8.3-FPM:

sudo apt update
apt-cache policy php8.3-common php8.3-fpm
sudo apt upgrade
sudo php-fpm8.3 -t
sudo systemctl restart php8.3-fpm

Substitute 8.4 or 8.5 for your installed branch. Review package upgrades, including extensions. If Apache uses mod_php:

sudo apache2ctl configtest
sudo systemctl restart apache2

Check vendor backports. Ubuntu fixes include 8.3.6-0ubuntu0.24.04.13 for 24.04 and 8.5.4-0ubuntu1.5 for 26.04. Compare complete revisions against Ubuntu’s security notice. Other repositories need their own advisories. An older-looking version can contain the fix.

Confirm the web runtime afterward and test login, uploads and database access. Updating WordPress or OJS alone does not update PHP.

2. Update containers separately

Host updates do not patch container PHP. Confirm a patched image exists, then replace app with your Compose service:

docker compose pull app
docker compose up -d --no-deps app
docker compose exec app php -v

Custom images require an updated base image and rebuild. Preserve persistent data. Shared-hosting users should request the exact patched revision.

3. Limit requests before PHP

In Nginx’s relevant server block:

client_max_body_size 8m;

Or inside the Apache virtual host:

LimitRequestBody 8388608

See the Nginx and Apache documentation. These impose an 8 MiB body limit. Adjust for legitimate uploads. In the active web runtime’s php.ini:

post_max_size = 8M
upload_max_filesize = 6M
max_file_uploads = 5
max_input_vars = 1000
max_input_nesting_level = 32
session.upload_progress.enabled = 0

Typical Ubuntu paths are /etc/php/8.3/fpm/php.ini for FPM and /etc/php/8.3/apache2/php.ini for mod_php. Adjust the branch number. php --ini reports CLI configuration only.

Test these example values. Disable file uploads if unused. Apply upload-progress settings at startup, then restart workers; application code and FPM .user.ini are too late for the confirmed early path.

Test Nginx with sudo nginx -t before reloading, or Apache with sudo apache2ctl configtest. These limits reduce exposure; they do not fix either CVE.

4. Emergency mitigation while patching

Prefer removing public PHP access and serving a static maintenance page. A PHP maintenance plugin still invokes PHP.

The OOM advisory recommends this incomplete emergency measure in the relevant FPM pool, such as /etc/php/8.3/fpm/pool.d/www.conf:

php_admin_value[memory_limit] = -1

This removes one controllable OOM trigger but permits unlimited per-request PHP memory, increasing denial-of-service risk. Use frontend limits and suitable cgroup/container boundaries. Underlying allocation failures remain dangerous; do not substitute RLIMIT_AS or RLIMIT_DATA. Audit overrides and restart all workers. Restore suitable finite PHP limits after patching.

For PHP 8.5, also set fatal_error_backtraces=0 in startup configuration. Remove invalid or obsolete per-request INI settings. These address specific stale-state paths only. Hiding warnings provides no protection.

5. Retire public PHP 7.4 applications

PHP 7.4 reached upstream end of life on 28 November 2022. Retire unused applications or migrate them to supported PHP. Legacy source patches and vendor fixes exist, but require explicit verification and should support temporary migration arrangements.

Remove forgotten subdomains, restrict administration through VPN/access policies, and keep FPM off public port 9000. Review logs, unexpected files, accounts and scheduled tasks. Patching does not remove existing backdoors. If compromise is suspected, isolate the system and preserve evidence. Follow NCSC guidance.
Revisiting Midnight Commander: A Classic Linux File Manager

Some Linux tools bring back memories as soon as you open them. Midnight Commander is one of those tools. Its familiar blue panels, text menus, and function keys recall the days when managing files in a terminal was an ordinary part of using a computer.

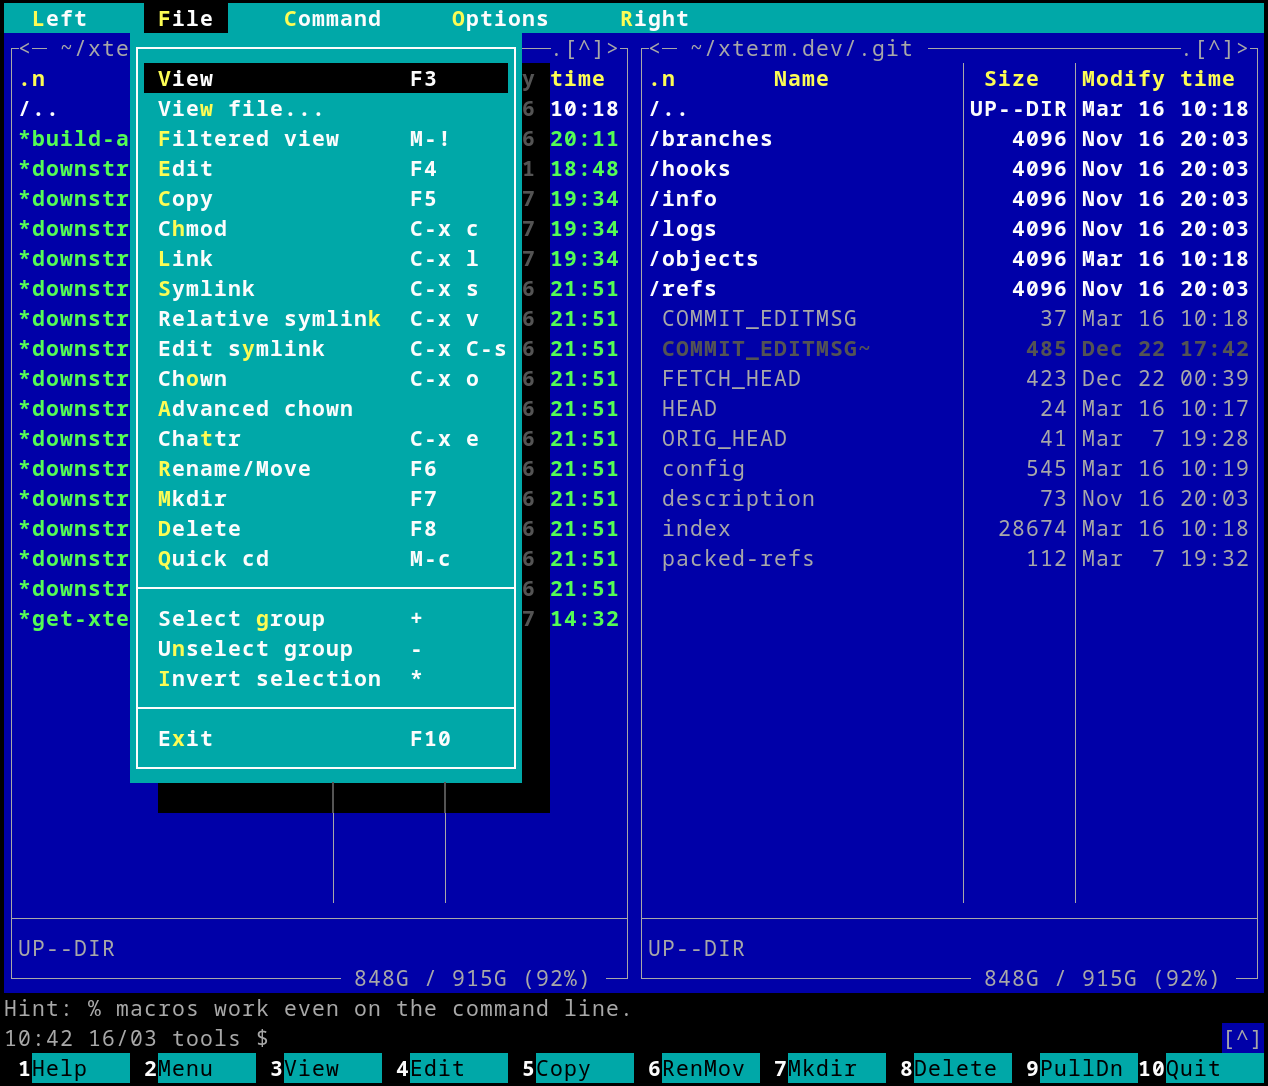
Known simply as mc, GNU Midnight Commander is a terminal file manager with two directory panels. Open your source folder on one side and the destination on the other, then browse and copy files using the keyboard.

Midnight Commander showing two directory panels and a function key menu in the terminal
Midnight Commander’s familiar two-panel interface. Screenshot from the official Midnight Commander project website.

The appeal of those blue panels

For anyone who remembers DOS-era file managers, this layout feels familiar. The available actions appear along the bottom of the screen, and the keyboard does most of the work. There is something satisfying about seeing both folders at once and moving through them without repeatedly typing ls and cd.

Midnight Commander also remains useful when working on a Linux server through SSH. It runs inside the terminal, so you can browse directories, inspect files, and organise folders without opening a graphical desktop. It includes a file viewer and an editor, too.

How to install Midnight Commander on Ubuntu

Install it using Ubuntu’s package manager:

sudo apt update
sudo apt install mc

Then launch it:

mc

Start with these shortcuts, documented in the official manual:

Key Action
Tab Switch between panels
F1 Open help
F3 View a file
F4 Edit a file
F5 Copy files
F6 Move or rename files
F7 Create a directory
F8 Delete files
F10 Quit

Modern desktops have changed how we manage files, but this old style still has its appeal. Two panels, clear actions, and a keyboard within reach are enough to make routine file management comfortable. If you have not used Midnight Commander for years, try typing mc again.

References

LobiShell: SSH Access to Linux Servers from Android

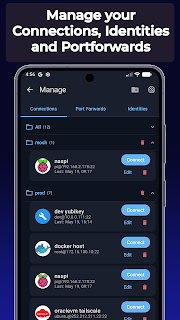
LobiShell saved SSH connections screen

Sometimes I need to check a Linux server when I’m away from my laptop. For small jobs, an Android SSH client is enough. LobiShell, developed by Lobianco Home Lab, is one option worth looking at.

It runs SSH sessions from an Android phone and also supports Mosh, SCP file transfers, port forwarding and SSH key management. These are useful features when you manage more than one Linux machine.

Advantages: LobiShell supports putty based private key format.

Connecting to your servers

LobiShell lets you save server connections and manage identities. A typical SSH connection needs the server address, SSH port, username and a password or private key. Once connected, you can use the terminal for commands such as:

uptime
free -h
df -h
docker ps
systemctl status nginx

The saved connections screen makes it easier to move between several machines without re-entering their details.

LobiShell connection manager, showing saved hosts and identities.

Finding devices on your network

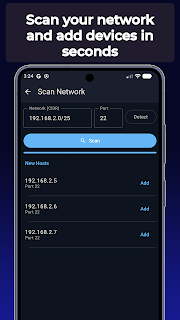
LobiShell includes a network scanner that can help find devices on a local network. This is handy when you have several servers, small PCs or other machines in a homelab. You should still verify the host’s SSH fingerprint before trusting a new connection.

LobiShell local network scan and discovered devices.

SSH, Mosh and file transfers

Regular SSH works well on a stable connection. LobiShell also supports Mosh, which is designed to cope better with intermittent connections and network changes. Mosh requires server-side setup, so it is not a drop-in replacement on every host.

SCP support lets you upload or download files, while SSH port forwarding can provide access to an internal service through an encrypted connection. For example, that can be useful when a web interface is restricted to the server’s private network.

Authentication and saved commands

The Identity Store manages SSH keys and passwords. LobiShell also advertises FIDO2 authentication with compatible hardware security keys. It has command snippets, too, so commands you frequently run can be saved instead of typed each time.

For sensitive servers, I would still use key-based login, verify host keys, and avoid exposing SSH directly to the public internet when a VPN is available.

Terminal appearance and backups

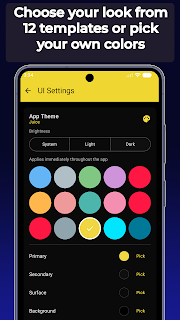
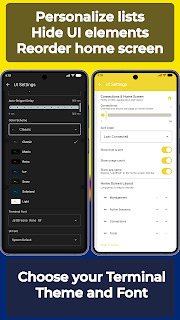
There are settings for colours, fonts and interface layout. That matters more than it sounds on a small touchscreen, especially when you have to read logs or work in a terminal for a while.

LobiShell app colour and theme settings.
LobiShell terminal appearance and interface options.

For moving settings between devices, LobiShell supports WebDAV synchronization, including compatible services such as Nextcloud. It also supports local peer-to-peer synchronization and exportable backups, with optional AES-256-GCM encryption.

LobiShell as SSH Client

If you only open an SSH terminal once in a while, a simple client may be sufficient. LobiShell becomes more interesting if you manage several servers and want saved identities, snippets, file transfers and synchronization in the same app.

The limitations are mostly those of working on a phone. Long commands and detailed configuration work are still easier with a keyboard and larger screen. But for checking a service, reading logs or restarting a container, it is a practical tool to keep installed.

Download: LobiShell on Google Play.

App details and screenshots: Google Play listing by Lobianco Home Lab. Features may change with future releases.

How to Generate Audio Spectrum Videos from MP3 songs with FFmpeg

Sometimes I need a simple way to convert an MP3 file into a video suitable for YouTube. Instead of using a static image.

I created a small Bash script that generates an animated frequency spectrum using FFmpeg.

The script uses FFmpeg’s showfreqs filter to generate an animated frequency spectrum from the audio.

How to use the script?

Step 1 : Download the script from gist

wget -c https://gist.githubusercontent.com/mypapit/37817eab6988fe05b87c64025409a894/raw/c04a917e12e9b89e6784783d19061dc771dbed99/spectrum.sh


Step 2: make it executable chmod +x spectrum.sh

Step 3: Use the script – ./spectrum.sh song.mp3

Alternatively you can also convert/export multiple mp3 files : ./spectrum.sh *.mp3

Why Use This Script?

The main advantage is simplicity. There is no video editor, GUI application, or complicated workflow involved. FFmpeg handles the audio analysis, visualization, video encoding, and audio encoding in a single operation.

It is also easy to modify the showfreqs parameters if you want different spectrum sizes, positions, frame rates, scaling methods, or visual styles.

For batch processing MP3 files into simple spectrum videos, this small Bash script provides a practical solution.

Sample Videos

yt-dlp – a verstatile video downloader tool

yt-dlp is a command-line tool for which allows a user to download audio/video from thousands of sites. The project is a fork of youtube-dl, which is based on the now inactive youtube-dlc.

yt-dlp can be installed using official releases or via package manager.

Unix-like operating system

curl -L https://github.com/yt-dlp/yt-dlp/releases/latest/download/yt-dlp -o ~/.local/bin/yt-dlp
chmod a+rx ~/.local/bin/yt-dlp  # Make executable

To update yt-dlp in Unix-like operating system

yt-dlp -U

Homebrew MacOS

brew install yt-dlp

Ubuntu

sudo add-apt-repository ppa:tomtomtom/yt-dlp # Add ppa repo to apt
sudo apt update # Update package list
sudo apt install yt-dlp # Install yt-dlp

Snap

sudo snap install --edge yt-dlp

Windows operating system

yt-dlp is also available for Windows operating system by using, winget:

winget install yt-dlp

Microsoft Windows binary package

The binary package for Microsoft Windows binary package can be downloaded from yt-dlp GitHub release page

Note that yt-dlp requires ffmpeg windows binaries which can be obtained from gyan.dev’s Codex FFMPEG Build

Please refer to this post for more information on the tips and tricks on using yt-dlp.

Semi-automatic bash script for triggering NVIDIA GPU fan in Linux

https://gist.github.com/mypapit/01770a1fa47826db1f50caf45f6a9035.js

Hello everybody. I’m sharing a handy script I use to semi-automatically check my GPU temperature and turn on the fan if things get a bit too warm.

I run this on my dedicated SoHo PC server, which hosts a modest LLM and a Minecraft server (yes, both at the same time).

Feel free to drop any suggestions or ideas in the comments. I’d love to hear how you’d improve it!

p/s: I’ve used GWE and CoolerControl, but it doesn’t fit my use case.